Thursday, August 27, 2009

Layout of the Week - Gymnastics


Delaney has been a gymnast since she was two. These pages commemorate her 2007-2008 year. Her individual & group photos are included along with coach & friend photos.

I was excited to find gymnastics paper that matched her Mini Olympic leotard for that year. Reminisce's Gymnastics papers in Perfect 10 and Gymnastics were fun to work with. I designed my layout to fit in as many of the "I Love Gymnastics" sayings as I could.

When I set my photos on the blue textured paper, I realized they would look find without mats. Not using mats made this a quick, easy layout.

First, I created the left page. Then I measured everything and created a mirror image layout for the right side.

This is a quick, simple, economical layout, using just two textured cardstock sheets, 2 printed sheets and one set of epoxy stickers as embellishment. For approximately $6, you can create a beautiful double-page spread, with some gymnastics papers leftover for more pages.

Tips

When using a solid background paper coordinates well with the subject matter of your photos, try laying them out on the paper to see what they look like. If they stand out nicely, consider not matting them. I love matting, but it does take extra time and it increases the cost of your project. So consider going without every once in a while!

Try creating the left side of a layout and then using its mirror image on the right side. This works best when you have photos that are the same size or photos that you can crop to the same size.

Use printed paper as an embellishment. I embellished my page with, not only the epoxy stickers, but with pieces of the gymnastics designed papers.

Supply List

Textured Royal Blue Cardstock (2 sheets)

Reminisce Gymnastics Collection Papers - Perfect 10 and Gymnastics

Creative Imaginations Epoxy Gymnastics Stickers from the Sportz Collection by Danelle Johnson

Tuesday, August 18, 2009

Layout of the Week - My Birthday


Delaney loves to cook! For birthday last year, she decided she & Dad would bake me a birthday cake. The cake was a first for both of them. I stayed completely out of their way. they baked, frosted & decorated my chocolate cake with chocolate frosting all by themselves. They even took photos of each other as they went.

They were both pretty proud of their creation and I of them. We all had a HUGE laugh when we realized the frosting on top was thinner than the flour on the bottom of the pan!! Just so you know, we've had a "grease & flour the pan" lesson since, stressing the need to dump the excess flour out!

All in all, it was a great cake & a great birthday for me!

In designing this page, I wanted to include all the photos Delaney & Dave had taken of each other during the cake making process. Lately I've been working with the "less is more" philosophy with my layouts, trying to lower the number of photos I use on each page, thereby letting the very special ones stand out. But this time, I just couldn't leave any out. So, I decided to print all the photos of my bakers as wallets. I'm sure I've mentioned it before, but I really do love the fact that I can easily choose to print any of my photos as wallets, 4 for only 13 cents, on Costco's website.

With photos in hand, I made a trip to Whimzee's. (Whimzee's Scrapbook Studio, down the street in Beaverton, where I work part time...check out the blog I write for the store, Whimzee's Girls Online...but I digress....) Right there in the front of the store was a new collection that had just arrived, it was perfect. It seemed that Early Bird from Cosmo Cricket had jumped right off the shelf & into my basket. This collection is kitschy & retro, bright & full of pattern, all things I love in scrapbook paper. The cute tags & sayings would be just right with my birthday cake photos. I found two pieces of Bazzill's swiss dot paper to match, dark red & butter (these probably aren't their real names). Loving ribbon the way I do, I loved the way the dark red twill from Creative Cafe reminded me of apron strings. And since I've been caught up in an inking frenzy lately, I grabbed a dark red ink from Studio G's $1 line. Never being happy with just a couple embellishments, I added some mini buttons from our bulk embellishments on another visit to the store.

While I was working on this layout, all the ladies at the store reminded me that I should be very thankful for my wonderful family. They couldn't believe that my husband, first of all, baked a cake with his daughter and second of all, remembered to take photos for me as he did it! Thanks honey! And thanks Delaney for coming up with this great present for mom! :) I love you both!

Tips

I haven't used my corner rounder in a long time, but I had a feeling that rounded corners on my papers would go nicely on this layout. I used my old Creative Memories rounder for the tags, but I wanted a larger curve on my larger paper pieces. Not having extra money in my budget right now to go out & buy a cool new tool, I looked around my work area and found something that would work just as well. For the rounded corners on my larger paper pieces, I flipped them over and traced the curve from the lid of an acrylic paint bottle onto the paper and cut along the line with my scissors! Another MacGyver moment for Julie! I do kind of come by it naturally...you should see what my dad can do with a pocket knife & duct tape!

One more tip...if you're looking for a way to create a cohesive look on your pages, try inking the edges of your page elements. Here, I used a dark red ink to ink the edges of almost everything on my page, including the background papers. Try it sometime, I love the way it brings everything together and gives my pages sort of a "worn" feel.

Supply List

Cosmo Cricket Early Bird Collection: Elements, Ribbon Sandwich, Sunrise & Apron Strings

Bazzill Swiss Dot dark red & butter yellow

Studio G ink dark red

Mini Buttons unknown manufacturer

Tuesday, August 11, 2009

Layout of the Week - Envelope Mini Album

My mom's 60th birthday was last weekend. For the lady who has everything, I like to create small personal gifts. She has something fun to enjoy and it fits into my budget too, which makes us both happy! For Mom's birthday, I took the kids camping with her & my Dad. So I didn't have much time to work on a project this week. Thankfully, I thought ahead, knowing I wouldn't have a lot of time. I am kind of a control freak...OK, no one I know would say "kind of" about it. So I do TRY to plan ahead, it's just that lately my plans have taken so much longer than I anticipate. I blame it on the kids...but I digress.In my planning, I remembered a cute envelope mini album I made in a class at the store a couple years ago. I had saved it to use as a gift and boy did it come in handy. The album is made of 7 envelopes. Two for the front & back covers and 5 for the middle pages.On the front & back covers, the flaps are turned toward the inside of the album. Small blocks of paper are adhered so that only one side is attached, while the other holds down the flap, this way you can put fun things inside the envelopes. I used them to hold notes from Delaney & me to Mom. I also let Jake draw on a small piece of paper & stuck it inside too.The front cover of this album is embellished with papers, an embossed stamp, silk flowers and a dragonfly charm. Any fun group of embellishments could be used to create the look you want.The flaps are cut off each of the inside envelopes. A slip of printed paper is trimmed to fit inside each envelope. For this project, little metal tabs are added to the slips of paper. Ribbons or small paper tags would also be nice additions.To hold the album together, use a small circular hole punch to punch 3 holes down the left side of each envelope. (I punched one set of holes and used it as a template to punch the rest.) Place a hinged ring in each hole to hold the book together. Embellish the rings with ribbons or attach small pieces of painted chipboard with twine for a fresh look.This album is a great gift to give to someone who will fill it up herself. Or do like I did and fill it with all sorts of fun photos & memories. To coordinate with my album colors, I printed my photos in sepia tone. (This is one of my favorite tips when the photos you love don't coordinate with the papers you love!) I printed a few 4 x 6 size prints and cropped them to fit. But most of my photos were printed wallet size on Costco's Photo Website.

Give this envelope mini album a try the next time you're in need of a personal gift that fits into both your budget and your busy schedule!

Wednesday, August 5, 2009

Layout of the Week - Blazer Game

This layout celebrates Delaney's First Portland Trailblazer basketball game. A friend gave Dave his tickets for this game. Delaney had really been wanting to see a game in person, so this was perfect timing. The two of them had a great Daddy-Daughter night out. And we're only slightly worried that sitting in the club level section, with its endless free food, has spoiled Delaney for future games! We can't wait to answer, "Yes, those specks are the players!" and "No, you can't have all the candy you want, we have to PAY for it in these seats!"

But seriously, they both had a wonderful time and can't wait to do a Daddy-Daughter Blazer game again soon!

As for me, I had a great time with this layout. I started by cutting rectangles of varying sizes & laying them down in different ways until I was happy with the left side of the layout. Then I cut shapes to match for the right side. It helps if you write the sizes of your first pieces on their reverse sides for future reference.
I love symmetry, but wanted something a little different. So I laid out the right side exactly like the left and rotated it 180 degrees, ending up with the top right corner of my double page spread the same as the bottom left.

Next, I cropped my photos the same for each side and put them down in a semi-symmetrical design.
I inked the large rectangles and photo mats with red and black inks. My final touches on this layout were ribbon and a journal box stamped with the date of the game and an index card for journaling. Lastly, I added a trophy charm accented with ribbon to the box, adhered with a Glue Dot.
As far as journaling & titles go, sometimes it's nice to skip the large title and just go with a special memory of your event. Here's what I wrote in my box: Delaney's 1st Blazer game! In the long souvenir line...Delaney, "Dad Look!" Dad, "Yes, it's a nice Christmas tree..." Delaney, "No Dad! Look up there at the TV, the game just started, we'd better get back to our seats!" DADDY'S PROUDEST MOMENT!!!

Supply List

Red & Black Textured Cardstock
White Cardstock
Scrappin' Sports Custom Paper, Blazer Basketball from Whimzee's Scrapbook Studio
Misc. Red, Black & White Ribbons
Karen Foster Mini Charm - Talents (I used the #1 trophy)
Autumn Leaves Doodle Tagged Stamp Set, True Story
Date Stamp from Joann's
Colorbox Inks Black & Scarlet
Creative Memories 1 1/2" square punch

Wednesday, July 29, 2009

My Birthday???

Is today really my birthday? Am I really 39? Well, I guess that's what the calendar says! But I'm going to enjoy every last minute I have left being 38! After all, I wasn't born until 9pm, Pacific Time, so I even get 3 more hours than if I was born on the East Coast! I should be honest, it isn't really turning 39 that bothers me so much. It's the fact that when the clock strikes 9pm (Pacific Time, in case you forgot!), I will be starting down the 365 day long road that marks the end of my 30's. So many things have happened to me in my 30's...good things, bad things, sad things, wonderful things, painful things (in so many ways, Jake this means you!), strange things, difficult things.

I know I have so many more things I want to accomplish in my life. And I know that (insert the age I will be next year here) isn't the end of the world and I guess it isn't even that old any more. Most of my friends who are close to my age, have young children...well, not as young as Jake...and they are still leading lives full of fun & excitement.

I guess I just remember how old I thought my mom was when she turned (insert the age I will be next year here), and that was pretty old. But then I was 19 when she turned (insert the age I will be next year here)...and really...how much does a 19 year old know about being OLD!

So I guess I'd better just enjoy the last year of my 30's, because I'll be pushing 60 when Jake's 19 and when he thinks I'm old then...he'll be right!

Tuesday, July 28, 2009

Layout of the Week - Memories of Brent


This week I'm sharing a layout I created a couple of years ago. I pulled it out this week to use the photo of Dave & Brent on my fundraising page for the Light the Night Walk. The photo may be the last one taken of Brent before he died. He was fighting to gain his strength after a bone marrow transplant we hoped would cure his non-hodgkins lymphoma. He was coughing a bit on this day and was hospitalized the next day and died, still in the hospital, about 3 weeks later.

It took me a few years to "get it together" enough to create some layouts honoring his memory. Of course I wanted to include this special photo. But I also wanted to include some others from that warm June Seattle day. If you have some photos of a loved one who has died and haven't been able to bring yourself to scrapbook them. Take some time to just look at them and let the feelings come. After you've exhausted that box (or case) of Kleenex, you may be able to remember some of the fun times you shared. I know it takes a while, this layout was created about 4 years after Brent died. But when I started working on it, it just came together. It's amazing to us today, what Delaney looked like at that time and that was how she looked the last time Brent saw her. Putting this layout together helped all of us, Dave & Delaney included, remember Brent as a friend & uncle who was looking ahead at his future with such a brightness in his eyes. This day is such a stark contrast to our last emergency visit to his bedside just hours before he died. By creating this layout, I wanted to replace some of our sad memories with earlier more peaceful ones.

If you are trying to find a way to create a memorial to a loved one, this is just one example. You might want something you can look at everyday. I created a shadow box of photos & memories for Dave after his dad passed away. The box hangs in the hall between Jake & Delaney's bedrooms where we can talk to them about their Grandfather who passed away before they were born, but still loves them so much.

Thinking about creating something like this may be very upsetting. If that is the case, you may want to gather your photos & memorabilia and put them into a box in a safe place until you are ready. Like I said, this could take a long time, but in the end, you will have a wonderful keepsake to help you remember your loved one.

Friday, July 24, 2009

Layout of the Week - Wedding Invitations


Yes, I know this isn't a scrapbook layout & I promise to get back to layouts next week. I've just had these invitations on my project list for quite a while. These invitations are for my brother & future sister-in-law's wedding in September. A few years ago, I tried having my own company creating handmade invitations & baby announcements. I have made quite a few over the years, but found that there was no way I could get paid enough for the time I was putting into them. So now, I create them by request for family and friends. In case you'd like to try your hand at creating your own invitations for your next small party or large event, I'll let you know how I created them. My brother needed 80 invitations and let me know that their colors are a sage or avocado green, copper & ivory. So that's where I started.

I usually create invitations by cutting each layer of paper on my large (12 x 12) Fiskars rotary blade cutter. Cutting each of the two or three layers of paper, one piece at a time. This time, I was in a time crunch and was excited to learn that Paper Zone (a cool paper store in my area) had pre-cut cardstock in tons of colors and sizes. Just by chance, they had EXACTLY the color I was looking for. They call it Wasabi, it's in their PZ Facets collection. So I purchased 4 packs of 20 sheets, in the A-7 or 5 1/8" x 7 1/8" size) to use as the backing sheet.

Next, I chose a copper metallic paper for the middle layer. I wanted a 1/4" border around all sides, so I cut the sheets of 8 1/2" x 11" paper down to two 4 1/2" x 6 1/2" pieces.

For the vellum topper, I chose ivory vellum from World Win. This vellum works very well in ink jet printers, which allowed me to choose colored ink to match the copper theme. I set my invitations up in Microsoft Publisher, I'd rather use Adobe Pagemaker, but don't have access to it on my current computer. My brother & his fiancee chose Vivaldi as their font. I was able to use the Pantone color chart available in Publisher to chose the exact ink color I was looking for. (It's 153CVC, in case you were wondering.) I cut the vellum into 4" x 6" pieces. I used page set up to choose a "portrait" setting and so I could put two sets of wording at the top and one sideways under them. This way I was able to cut three vellum toppers out of each 8 1/2" x 11" sheet, thereby saving a few sheets of paper and a little bit of money. The vellum would sit on top of the Wasabi paper & copper paper, with a 1/4" border around it.

After sorting the three layers into individual invitations, I used a Memory Makers Paper Piercing Tool to poke small holes approximately 1/4" from the top & sides on the left and right sides of the vellum. (I use my paper piercing tool on top of a self-healing mat.) I then placed small copper brads from American Crafts into each hole.

For a final touch, I used spray adhesive from Loctite to mount small copper skeleton leaves from Mountain Valley Paper Company at the bottom of the invitations. The wedding has a Fall leaf theme and I thought these leaves would be a fun addition.

The invitations will be mailed in matching Wasabi envelopes from Paper Zone, in the A-7 or 5 1/8" x 7 1/8" size.

The approximate cost for the supplies to create 80 of these invitations is $120.00

I'm happy with the way these invitations turned out and thankful to be done with such a large project. I probably wouldn't recommend a wedding as the project to tackle the first time you try creating your own invitations, but you should definitely try creating some for your or your child's next birthday party! People always love receiving something handmade in the mail. I've had many comments over the years from customers & friends, that they are keeping my invitations as mementos of a joyous event.

So, don't be afraid to try creating your own invitations! And remember, you can always ask me any questions you have while working on your project. I've run into all sorts of dilemmas in my projects and would be happy to share my solutions with you!

Friday, July 17, 2009

Celebrating and Remembering


I'm so excited to have my 100th follower today! Her name is Erin Bassett. She's got a great blog, creativitE, where she shares all sorts of cool cards & scrapbook pages she's created, along with some beautiful things using ProvoCraft's Yudu Screenprinter. Check out her silver chandelier tank top! Join me & follow Erin on Twitter!

I'm not stopping at 100! If you're looking for some creative inspiration or just enjoy JulieChats, please sign up to be a follower! And THANK YOU to all my current followers! :)

Oh, and it's Friday! And Friday's around here wouldn't be complete without a stop by Ann's blog, Ann Again and Again for her Virtual Girls' Night Out. Join me at the party & meet lot's of other cool bloggers in this great big blog hop! Fridays wouldn't be complete without it!

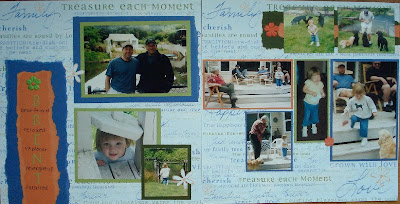
Now, for the remembering...today is the 6th anniversary of the death of a close friend. In 2003, at the age of 34, Dave's life long best friend, Brent, died of complications following a bone marrow transplant. (The photo is Delaney & Brent on his 34th Birthday.) We had all been so hopeful that the transplant would cure Brent's Non-Hodkins Lymphoma that his death came as a complete shock. All throughout his 3 year battle against cancer, Brent was the most positive person I had ever known. He was strong and sure that he would beat it in the end. He laughed and made us laugh while he shaved his head, receding hairline & all, hoping that maybe he'd have a full head of hair when it grew back after the chemo. He laughed more when he sent me for Taco Bell during a chemo treatment. Being a guy who didn't eat much fast food, he figured, "what could it hurt now?" He laughed that the nurses said he was the only chemo patient they had who GAINED weight!

Personally, I think that was because I made him what we called the chemo cake after his treatments, and I'm pretty sure he ate the whole thing! Makes me want to make one today, in Brent's memory. It's really called an Earthquake Cake, German Chocolate type "frosting" on the bottom of a chocolate cake filled with big chunks of cream cheesey goodness! I'll find the recipe & post it soon!

Now, looking back, I think that Brent laughed with us about his cancer because he was comfortable enough with us to laugh about it, but also because he knew that's what we needed. It had been a tough couple of years for us with many deaths in among our family and friends. Dave's dad had passed away less than a year before Brent's diagnosis. And Brent's dad passed away not too long into his treatment. We all needed to find things to laugh about or we might never stop crying. It wasn't until Brent's funeral that a friend of ours (an unmarried guy, like Brent) said in his eulogy something Brent had told him just after he was diagnosed. Brent told him that he was glad that he was the one among all our friends who had cancer. He was thankful that all these guys, who counted him among their very best friends, would not have to worry about leaving their kids without dads or their wives without husbands. Of course this made me cry more, even though I didn't think that was possible. I'm so thankful that Brent had so many wonderful friends who he could share all the complicated thoughts that someone with cancer must have during all the stages of their illness.

I cry a lot, thinking back about all of this...about how only the pictures remind Delaney of her Godfather, who passed away when she was 2 1/2...about how she learned about death at such a young age...about how Dave must miss his best friend, the best man at our wedding, Delaney's Godfather, Jake's namesake. And how Brent would have loved Jakob Brent, in all his screaming, dancing, Terry Bradshaw look-alike glory.

Brent definitely would have had a big laugh at his little guy! I know he's looking down on us smiling! And right now, he's telling me, "Hey Jules, go throw away that pile of Kleenexes & get out there and enjoy the great Oregon summer day with those beautiful kids!" ...or something like that! :)

Please check out my fundraising page on the Lukemia & Lymphoma Society webpage. The LLS was one of Brent's favorite charities. He got us involved doing the Light the Night Walk when Delaney was only 18 months old. It's a great event, everyone walking in cities all over the country with red glowing balloons. The cancer survivors carry white glowing balloons, which bob up & down among a sea of red balloons, surrounding them with all the people who love & support them. Donate to the charity on my page or sign up for the Light the Night Walk in your area & do some fundraising of your own!

I know this post has been a pretty sad one, but I hope helping someone with cancer will make you feel much better & hopeful today! You might find some of this post on my page, along with a photo of Brent. Enjoy your weekend & take a moment to think about how someone with cancer has touched your life!

Monday, July 13, 2009

Layout of the Week - HOME


OK, I know you can see that this isn't technically a layout! But it's the project I managed to finish this week. Sometimes I just feel like doing something "outside the box". I was looking for something to hang above the mirror in my foyer and these Rusty Pickle chipboard letters jumped right out at me. Alright, that isn't quite how it happened, when I was at the store one day, Twila said, "Hey, Julie, why don't you take these home & do something cool with them!" I did think of where to hang them right away, it just took me a while to get to the project.

I'm going for kind of a Fall pallet downstairs in my home. Dark red in the family room, a pretty gold in the nook, a great color from Devine called ginger in the dining room and aspirations of a nice caramel macchiato type color in the kitchen & foyer. I say aspirations, because in August we'll have been here 5 years and it's still the same "builder's off-white" as the day we move in. Well, at least we've painted most of the rest of the house. And if the foyer's walls weren't 2 stories tall with a huge staircase, it would probably be painted by now too. I guess I'm waiting for one of two things to happen #1 we have enough extra money to hire a painter or #2 our overworked friend Jeff, takes pity on us and does yet one more "honey-do" job for us! Jeff has been doing "honey-do" projects for us for years. Outside of simple painting & yard work, home improvement projects aren't Dave's (or my) strong suit. So when it comes to balancing a ladder on one step & a couple phone books, Jeff's our guy! Don't laugh, I've seen him do it, in the stairway of our last house. I was the one standing there, mouth dropped open, with the 9 & 1 pushed on the phone just waiting to push the other 1. There was Dave, pushing against the ladder while it balanced on one step & the phone books, while Jeff perched on the very top on tip toes, perfectly edging the wall up to the ceiling.

It's awesome to have friends who'll risk their lives for you....but I digress! This cute wall hanging will perfectly match my caramel macchiato walls, in the event that Jeff feels like risking his life again for us sometime in the future!

So, to be sure it matches, I chose papers from Bo Bunny's Beautiful Life collection. This collection is a great combination of Fall colors: browns, reds, oranges, greens. I used copper acrylic paint on the edges & backs of the letters. I thought about tying them together with ribbon, but I liked the more rustic look of thick twine. For embellishments, I used some paper leaves I had in my scrap room. I'm not sure who makes them, they were shared with me by a friend who thought she could never use all that were in the jar she bought them in. For the final touch, I used a couple of the matching stickers from Bo Bunny's Beautiful Life collection. I mounted the stickers on copper metallic paper and tore it around the sticker's edges, just to cover up the adhesive on the back.

Right now, my HOME wall hanging is hanging in a door way at Whimzee's. So maybe that will give me time to bribe Jeff with some ice cream...to come over & paint the foyer!

Supply List:

Rusty Pickle Chipboard set H-O-M-E

Bo Bunny's Back to Basics Beautiful Life Collection papers
H-Life Stripe (I used the back of this one.)
O-Collage
M-Leaf
E-Blessed

Copper Metallic Acrylic paint from Tulip

Paper Leaves (not sure of their manufacturer)

Bo Bunny's Beautiful Life Collection stickers

Thick Twine (not sure of its manufacturer)

I'm also thinking that I might print some tiny sepia tone photos of the family & hang them on the letters too, but that's a thought for another day! Enjoy your week!

Friday, July 10, 2009

Family, Friends & VGNO


I hope everyone had a great week! We had a blast with a lot of old friends over the 4th! The neighborhood parade was as fun as ever. Delaney & the neighbor girl decorated Jake's stroller, Delaney's bike and even Dave's bike. We were all so festive!

I picked up my niece on Monday, so she could stay with us a few days. My sister-in-law came the next day, to stay for a few days, then take her wonderful daughter home. They'll be back in a week & a half. The Wonderful Niece is coming up to attend the University of Portland School of Nursing in the Fall. There are all sorts of college related things she's doing this Summer, so we get to see her more than ever. We're very excited to have her closer to us. We all went to the zoo again this week. It's so fun to see Jake enjoy the animals. And this time, Sam the baby elephant was much closer, so Jake got to laugh at him as he walked around. I guess that little toddler stumbling is even funny to them!

We've got friends coming over tonight for dinner and then I'm working in the morning at the scrapbook store. I'm excited to work since we have a digital camera course starting tomorrow and I can listen in & hopefully learn a lot! I'm stopping by Ann's Virtual Girls' Night Out as soon as she's ready to party! I may not be able to visit a lot of you until Sunday, but look out for a late comment or too, that will be me!

Enjoy your weekend!

Tuesday, July 7, 2009

Layout of the Week - Tooth Fairy


This week's Layout of the Week is a special page for Delaney. She lost her first tooth on April 5th, a few weeks after she turned 8 years old. Yes, her first visit from the tooth fairy didn't come until she was 8 years old! After MUCH effort I managed to pull the darn thing out for her. She had been wiggling it for about 2 years.... By the time she was finally ready for it to come out, she wanted us to tie it to a door & slam it, which we did...about 5 times! Both her new front teeth were in by this time and she had what her dentist called "shark teeth". Two rows of bottom front teeth. After taking a look at this tooth, the dentist's mouth dropped open (out of Delaney's view of course) and he said, "you got this out?" The root on the poor tooth was longer than the tooth itself. After the tooth finally came out and Delaney had her $2 from the tooth fairy, she made us pay up too. We had promised her $25 if she could get the tooth out before the dentist wanted to pull it. We decided that it would be cheaper to bribe her with $25 than pay the dentist for an extraction. It worked with that tooth, but the dentist told her that she has until August to get that other lower front tooth out or he's going to pull it. After all the drama, screaming & crying & door slamming, I don't think she figures $25 is worth pulling the next one out herself. So I guess we'll have to wait & see, but she does have an extra little "center" tooth on the bottom as of this post!

As far as my layout is concerned, this is one of my more simple ones and I'm very happy with it. I used two sheets of Reminisce's Tooth Fairy paper, one side for the background and then a strip of the other side as a mat for my photo, edging it with the Redwood ink from last week's project. Next I used two small strips of the white glitter paper from last week's layout on either side of the strip. It's so nice when the supplies & papers you just used on a layout are right there on the table just waiting to be used again. Then I used a red pen to journal inside the title that is printed on this paper. This layout couldn't be simpler, in fact it took about 10 minutes from start to finish. The one photo tells the whole story, I tried to take a picture of the strangely shaped tooth, but it came out fuzzy. And besides, all of the ladies scrapping that night thought it would be gross to include a photo of the tooth in a layout. But I probably would have done it anyway, if it had been in focus.

Try the technique of using one large strip of paper with two smaller ones framing it in one of your layouts. It's a very quick way to finish a page!

Wish us luck with that next Tooth Fairy visit!

Friday, July 3, 2009

Happy Summer! Have a great 4th!


I hope everyone has a great 4th! Dave & I took the kids to the zoo this morning. It was nice to be there before it got to 90 degrees, like it is now! Portland's having a heat wave for the 4th, so now we're home in the AC. Later we'll be out in our backyard pool, hope it has warmed up a bit since yesterday! Here are some pics from this week, the first pool outing of the summer. Can't wait to inaugurate our firepit tonight with some s'mores!

Tomorrow we'll be enjoying the neighborhood parade and all the kids on their decorated bikes. I'll post some pics soon! And then we're heading to our friends' big party, they're even taking out their front grass & putting in beach sand!
OK, they are landscapers and are putting in a new lawn soon, but still, it should be very cool! They're renting a big bounce house & a dunk tank, hopefully I'll get Dave in there! Combine that with hamburgers, snacks, all sorts of alcoholic drinks & a pile of illegal Washington fireworks and we should have a lot of fun tomorrow night!

Hope you all have just as much fun as we are! Enjoy!

Don't forget to stop by Ann's Virtual Girls' Night Out for the Laidback Independent version!

LinkWithin

Related Posts Plugin for WordPress, Blogger...