Monday, April 8, 2013

Movie Night Theme Birthday Party

Last month, I threw a Movie Night theme birthday party for my daughter, Delaney.  She was excited to share her 12th birthday with her middle school friends.  We went through a few ideas before settling on a Movie Night theme party in our home.

I always think of the invitations first when planning a party.  A couple months ago, I found some great digital scrapbook designs when I planned my five year old son's Herbie the Love Bug party.  I enjoyed them so much, before I looked anywhere else, I stopped over at the Scrapmatters site to search for anything related to movies.  As it turned out, they had the perfect digi collection in the colors we were thinking of...red, yellow & black.  The Movie Magic Collection by Jennifer Labre Designs had everything I needed.  When designing invitations, I've found it's SO much easier to start with a digital scrapbook collection.  I used Photoshop Elements to create these invitations.  With millions of options available in this program, I like to narrow my choices by finding a digital scrapbook collection that matches my theme and using it to create my invitations.  I printed these invitations at home on white cardstock.


Delaney used a Decoration Roller from Plus Corp. to decorate the envelopes, writing her guests' names inside the strip in red ink.
With the invitations taken care of, it was time to move on to decorations!  As I started looking for decorations, I wanted them to be fun, creative and also have a low price tag.  Having a subscription to the Silhouette Online Store, I always search there for any upcoming projects...just to see what they have.  This time, I was very pleasantly surprised to find exactly what I was looking for...some fun cutting files that I could use to decorate the house and also the cake.  I found a film camera, the five movie reel & film set by Lori Whitlock and the movie night title by Samantha Walker.  They all seemed perfect, so I grabbed some paper at my local scrapbook store and got to work cutting things out on my Silhouette Cameo.  (Yes, I love this machine!  I can't say enough great things about it!  I won mine in a giveaway over on Today's Creative Blog in January 2012 and I've been busy using it ever since!  Kim over at TCB often has discounts on the machines and from time to time gives one away, so stop over & check out her blog, if you haven't already!)

OK, here's the fun part!  I used simple, solid color cardstock to create my decorations.  Some of the paper is textured and some is not.  I knew that the group I was entertaining wouldn't be too concerned with the small details, just the atmosphere!

With the birthday girl in charge, we started with the Candy Table!  We thought it would be fun to have at least one favorite candy for each guest, so we asked them to name their favorite when they RSVP'd.  Since they're middle schoolers, most of the RSVP's came directly to Delaney at school, so she kept a candy list. On a recent supply shopping trip, she grabbed every kind of candy on the list...and a couple more "just in case".  For setup, we cleared a sofa table in our breakfast nook (it usually holds school supplies & homework, which we moved into the office and CLOSED THE DOOR!).  To give our display some height, I placed a tall box in the center and added a 12-pack of soda to each side and pushed them against the wall.   Next, I covered the boxes and table with a piece of navy velvet fabric I've had for years and never have found a use for.  I thought it had an old time movie theater type look and it was great that it covered the whole table too!  Delaney had specific ideas for the arrangement of the candy, so I let her go to work.  She placed black paper bags with stars in the center of the table, so each girl could make her own candy mix.  The plastic popcorn containers held pens for a party game and slips of paper with fun ice breaker questions to begin the party, since everyone didn't know each other.  Delaney used colorful bowls to hold some of the candy and just left others open in their packages.  She used acrylic risers to give some of the bowls a little height and sprinkled some confetti made from stars punched out of our discarded paper & shapes as a finishing touch.


In addition to candy, no movie party would be complete without a selection of salty snacks!  I found a large popcorn bowl and little boxes for each girl in the dollar section at Target.  We served buttered popcorn, kettle corn, herbed popcorn from Trader Joe's and aged white cheddar Pirate's Booty.


After living in my house for eight years and hosting tons of parties for both kids and adults, I've found that keeping decorations simple doesn't have to be boring.  One of my favorite ways to decorate is to hang strips of streamers down from the lights over my dining room and nook tables.  For this party, I had a friend helping with decorations in the morning.  She cut streamers about 4 feet long and draped them over the arms of my chandeliers.  Then she used clear thread to hang a few of the stars I cut out of gold and silver metallic cardstock to add a little sparkle.


We are not huge cake/frosting fans in my family, so Delaney chose a plain cheesecake from Costco as her birthday cake.  I used black & red frosting tubes to add a little color and my Silhouette cuts to make it a Movie Night party cake!  I cut 2 large film cameras from my black paper.  Then I took one of the pieces and used clear tape to attach one skewer to each of the three legs, leaving about 3" of skewer sticking out past the end of the camera leg.  After the skewers were attached, I used scrapbook adhesive to adhere the remaining camera over the top of the skewers.


Next, I carefully stuck the skewers down into the cheesecake, so the camera stood at the back of the cake.  I placed a film reel in front of the camera and one of my metallic stars in front of that.  I loved that the film strip had seven spots, so I trimmed a piece of white paper to fit and added Delaney's name to the strip with silver glitter stickers.  Since she rarely, if ever, finds her name on a personalized item, she just loved seeing it on her cake like this.  I placed the film strip in front of the taller items, stuck in "12" candles and we were set! 


To cover the table and take away attention from my Christmas table cloth (the only red one I have long enough to cover the table with two leaves), I cut a piece of paper from my son's IKEA easel, long enough to make a table runner.  Delaney & a friend sprinkled the table with their homemade confetti and added some film strips from the decoration roller to give it a finished look.


As far as the scheduling of activities during the party, Delaney had a great plan and the girls had a lot of fun!  She started with an ice breaker her theater teacher used on the first day.  Then they watched Lemonade Mouth, a fun preteen/teen Disney movie that most of the girls had seen.  Delaney wanted the girls to pay attention to the details and actually watch the movie, so she found a quiz online and printed one copy for each guest.  She told them there would be a quiz at the end of the movie.  Everyone watched the movie and had fun filling out their quizzes at the end.  For prizes, she handed out boxes of Cracker Jacks that we had decorated with a little baker's twine.


After the quiz, the girls made individual pizzas and ate while decorating the paper table runner with crayons Delaney had placed on the table in plastic popcorn containers.  They had dessert, Delaney opened presents and we shot some fun photos in front of a party backdrop we had created with long pieces of yellow paper. (I "borrowed" the yellow paper from my son's preschool...his teacher's daughter was at the party, so she was more than happy to "loan" it to me!)  Delaney and her friend used metallic stars I cut on the Cameo, backed them with red stars, so the "12" cut out of the inside would really pop, and placed them on the paper randomly.  We used a few streamers and added a "red carpet" with some red preschool paper.


For all my parties, I try to have a little fun with my front door.  For this party, I used one of my Southern Living at Home door buckets filled with white paper Easter grass.  I added some of the movie night theme cuts from my Cameo, a few streamers and the large Movie Night cut to the front.  I added an outline to the Movie Night cut, to give it an extra layer of color.
This bucket ended up being my favorite decoration for the party!


Delaney gathered a few fun props and the girls had a great time taking photos of each other in front of our "red carpet" backdrop!  Everyone had a ton of sugar, snacks and fun!

The Movie Night theme party was perfect for our group of middle school girls!!
And it could also be perfect for your girls, boys, families or groups of any kind!

Check out my fun idea and TONS of other amazing ideas over at the link party on Today's Creative Blog!  Tuesday is 'Get Your Craft On' day!  You'll find SO many cool ideas there every week, you'll wonder why you hadn't found it before!  Oh, be sure to tell Kim (Creator & Diva of TCB) HI and that Julie from JulieChats sent you!

Today's Creative Blog

Friday, April 6, 2012

Introducing a Brand New Type of Embellishment...I think I invented it!

Monday, April 9 - UPDATE - OK, it looks like I didn't invent my cute little embellishments, but the commenter who said she'd seen them before didn't tell me where or give me a link.  So, if someone has a link, I'd love to check out the inventor of this cool idea! ;)

Last night, while creating a last minute Easter layout for the store, I think I might have invented a brand new and COOL (if I do say so myself) embellishment!  I searched the internet and couldn't find anything exactly like it.  Yes, the supplies are used together in a few different projects, but nothing with just a Glue Dot and Baker's Twine.  Sure, it's a very simple ideas, but I think the best ideas always are!  My new "Swirl Pops" (yes, I just made that up this minute), are the perfect addition to your next card, scrapbook layout or altered journal...just a small 'pop' of color.  They are not at all sparkly or girly with absolutely no glitter, they'll be perfect for on projects for guys, heirloom projects or where you just want a bit of flair with no glitz!

So, without further ado...meet the new Swirl Pop:


With a pile of baker's twine and a stack of Pop Up Glue Dots on my craft table, this idea just 'popped' into my head.

First, remove the clear acetate from one Pop Up Glue Dot.  Hold the cut end of a piece of baker's twine, twist the end clockwise, in the direction it is intended to twist, and press the very end into the Glue Dot with your finger nail or a paper piercer.  (If you're using twine from the bolt, don't worry about cutting the twine yet, any length will do, but I wouldn't go LESS than 6")


Next, twist the twine clockwise around where you initially pushed it into the Glue Dot.  Do this slowly, making sure the twine you are wrapping doesn't start to untwist (making the color & white strings very loose).  Keep the strings twisted while wrapping the twine around itself a little bit at a time.  You may need to use a finger to apply a little pressure to the swirls of twine as you wrap.


When you get to the outside edge of the Glue Dot, keep wrapping one more time, so that your twine is covering the side of the Glue Dot, as well as the top.  At this point, cut the twine, so that you have a very short tail, smaller than the diameter of the Glue Dot.  After cutting the twine, peel the Glue Dot off of its backing.  Flip it over and press the tail of the twine into the underside of the Glue Dot.


Congratulations, you have created your very own Swirl Pop!


After creating this layout and applying my Swirl Pops to it, ideas for new uses for the dots have been 'popping' into my head all day!  I'll be back soon with some more Swirl Pop creations!

For now, I'll share the Easter layout I created just before I came up with my new invention! ;)


I love the bunny stamps that coordinate with this beautiful collection from WeR.  The collection is called Cotton Tail and I {LOVE} it!!!

Happy Easter!  And please let me know what you think of my new embellishment!

I'm sharing this creative craft idea with my friends at...

Skip to My Lou's Made By You Monday...

Skip To My Lou

Today's Creative Blog's Get Your Craft On Tuesday...

Today's Creative Blog

Supplies:

Paper:  WeR Cotton Tail Collection, AC White Cardstock
Ink:  Martha Stewart, Forget-Me-Not; Tim Holtz Distress Ink, Walnut Stain; Color Box, Heliotrope & Orchid
Baker's Twine:  The Twinery
Punch: WeR Lucky 8 (pink punch)
Template: The Crafter's Workshop, Chicken Wire

Monday, April 2, 2012

Silhouette Class...Lesson 1

OK, I was more than EXCITED to have WON a Silhouette Cameo from Kim over at Today's Creative, back in January!  If you've got one on your Wish List, you'll want to move it to the top, as quickly as you can!  And remember to check over on Kim's blog, she just gave another one away last week and who knows when there might be another giveaway!  (Follow my JulieChats Facebook page & I'll be sure to let you know when I see another giveaway!)

Since receiving the machine, I've created some small projects...pieces for kits I'm designing for a workshop series at the store, some cute Project Life cards (no, I'm not doing PL, but these cards are TOO cute to pass up) and I even created some theme party items for my daughter's 11 birthday Rock Climbing Party.  I promise to share all the details of the Rock Climbing Party in a separate post, very soon!  There are just too many photos and details to create a post right now.

After some experimentation with my brand new Silhouette Cameo, I read a Facebook post from the Queen of Online Digital Scrapbook Classes...Jessica Sprague where she announced that Kerri Bradford would be teaching a Silhouette class.  The class is called Silhouette: Getting to Know You and you can find it HERE.  I signed up for the class and started Lesson 1 today.  Right now, the class is on sale for $19 and it's a bargain!  You have access to it FOREVER and it comes with tons of great Silhouette patterns too!

Now, being a person who gave her best effort with the Pazzle machine (The store where I work owns one and I had it at home for year and wished I could throw it out the window at least a couple times a week!)  So I did have a rudimentary knowledge of the type of program that comes with the Silhouette.  So I moved very quickly through the first few parts of Lesson 1.  But WOW, there were so many tips and new things to learn about organizing my files, the Silhouette store (I didn't know there were files on sale each week!  HELLO!) and I learned some great things about the program that I didn't know before that will make using it SO easy!

Well, at the end of Lesson 1, we cut out a circular flower card and the sentiment Thanks.  Given my current love of mist (I used Luminarte Radiant Rain mists in Ginger Flower and Blue Flame), I couldn't resist misting the petals (they were meant as negative space to be tossed out) and sticking them back over the die cut card.  I also inked the edges of the card with some fun Eggplant chalk ink from Inkadinkado.  I cut my card from some white card stock with small white flecks in it...not sure where it came from...and my Thanks. out of some amazing shimmering purple cardstock from Peterson Arne...don't have any details on it either....

I think the card turned out pretty cute and I can't wait to get to Lesson 2 of the class!  I'll try to share my creation after I complete that step too!

If you own a Silhouette, you should definitely give this class a try!

Here are some step by step photos of my little card...


Such a fun little card!  It would also be cute for Christmas, as a card or gift tag!


 This photo shows the box after the petals were removed!  Remember to always mist in a box,
and for an even shimmer of color, spray at the BACK of the box
and let the mist "rain" down on your die cuts.


I LOVE the finished product!  A few of these tied with a ribbon would make great teacher gifts!

Friday, February 17, 2012

One Little Word 2012

Hi!  After sharing my 'One Little Word' for this year...LEARN, I dove into the videos and materials included in the class of the same name by Ali Edwards that I'm taking over at Big Picture Scrapbooking.  I still have to do some of the January work and the February work too, but I have really enjoyed listening to Ali explain her prompts and the ways we can interact with our word this year and use it to motivate ourselves.


When I chose the word LEARN in January, I saw myself learning all sorts of new things this year.  In addition to learning to complete some of the projects piled in my studio, I am working on learning more about the software for my new Silhouette and of course finally taking the Jessica Sprague PhotoShop courses I purchased last summer.  In January, I embarked on a path to teach myself to knit.  Now, at that time, I wasn't too busy with my jobs and the kids were out of school.  Every night I see that bag with my little tiny piece of knitting in it, sitting next to my bed, begging me to learn my second knitting stitch.  But every night, I have to tell it, "Not tonight!"  Working late into the night with my transcription job doesn't give me much time to sit and teach myself to knit.  But I do have more time during the days for Jake and other projects when I can finish the typing at night, so I guess I'm just prioritizing.

After listening to Ali talk about the different ways our words may surprise us, I realized that I am not the only one around here who is learning this year.  Jake is in his first year of preschool and is learning how to write his name, what all the letters are, what a tornado is, how to get along with other kids his own age and maybe, if we're lucky, he's learning that we aren't trying to poison him every time we gently coax (force) him to try new foods that he ends up loving...the Tomato Basil Soup from Costco is now a favorite, even with the "little green things."

And then there's Delaney, sadly, a big learning point for her this year is disappointment.  She is learning to deal with not being chosen for things and how to deal with being left out.  I know that these lessons will serve her well, especially with middle school just around the corner.  But as a mom, I'd rather have my teeth pulled without anesthetic than hear that she has another disappointment this year.  She is so strong and is dealing very well with all this stuff.  For her, art is a calming distraction from real life.  In November, she began taking art lessons and it has been a great experience.  Her teacher, Jen, is a professional artist who has taught art to kids for years.  She just opened her in-home studio and Delaney was one of her first students.  Delaney has loved learning, in an in depth way, sketching, painting and mixed media.

After listening to Ali, I thought more about my word, LEARN!  As Ali said, we should all look around us and see how our word works in the world.  Now, I'm only looking around my own home, but I can see my word touching all of us!

Thanks, Ali!  And if any of you would like to join in the One Little Word class, just click the button above for more information.  You can join anytime until December 2012, and it isn't difficult to catch up on the prompts.   But don't feel like you have to cram them all in, it's a self paced class and I'm trying to remember to take my time and enjoy my word and the slivers of time that I carve out to spend on this project....

Friday, February 3, 2012

2012...Be Inspired, Get Organized, LEARN

Wow, it's sure been a while since I've blogged...maybe it's about a lack of time or maybe it's about a lack of inspiration...maybe it's a bit of both.


But, as I attempt my first Roundup (I'm inspired by Katie Nelson, just took a class from her at Big Picture Classes, check out the Roundup section on her blog for more info.), of January 2012, I took a few minutes to read through some emails I've been meaning to get to.  I had 5 emails from the Ali Edwards series 52 Creative Lifts that I had been waiting to read.  While my January photos uploaded to Costco, seemed like the perfect time to get to them.  Reading through these weekly emails, inspired me to head over here and write a post about what I'm up to this year.

First, I began January thinking about my One Little Word for 2012.  WAY back in 2010, I decided on BELIEVE and ACHIEVE for my word(s) :).  I set goals for myself that had to do with blogging, losing weight and working on my finances.  I have to say that, as is usually my habit, I began with a strong focus on my goals and LIFE got in the way.  When it was time for 2011, I had helped my finances by taking a 2nd part time job, but doing so had squeezed out time to concentrate on blogging or anything else.  It seems to take me quite a while to "right my ship" when I encounter a big change like this, so here I am in 2012, forcing myself to make time to be creative (that might even include some blogging here & there).  With Jake in preschool, even for only 2 mornings a week, I can do some of my second job (transcription) during the mornings and not just into the wee hours of the night.  Getting just a little more sleep sure helps with the creativity and motivation!

So back to that 2012 word....mine is LEARN!


One of my huge goals is to learn Photoshop!  I purchased two online classes at Jessica Sprague .com and now I have to make the time to go through them so I feel like I have a better handle on Photoshop.  I would LOVE to use it in my regular scrapbooking AND to get started with some digi scrapbooking (I bought a subscription to The Digi Game over at The Daily Digi last year and I'm SO excited about all the great digi items I get for only $7.50 a month).  I have used a few of my digi elements to create invitations and some other fun little projects, but I have yet to complete a real scrapbook layout!  So I really need to get to those PS classes! (I did make my LEARN tag with PS and a kit from the Digi Game, but it took me forever and I can't figure out how to just use the part I want and not a rectangle background...time for the classes!)

As a part of my effort to create enough time to LEARN in 2012, I thought I'd better get organized!  I have read Katie's blog for a few years and have always admired how she rounds up each month at the beginning of the next month and then moves on.  (Read how Katie explains Roundups HERE on her blog!)I took her Roundup Class in January, over at Big Picture Classes and it inspired me to design a Monthly Roundup Workshop at Whimzee's Scrapbook Studio, where I'm in charge of all the marketing, while also teaching & designing.  I wanted to share Katie's basic technique and help the participants form a sort of support group that will meet each month to create a Roundup layout and also discuss the different ways that we can incorporate Katie's technique in regular paper scrapbooking in many different forms.  I want to share the ideas I am finding on creativity, inspiration and organizing with the group.  So, I guess, here I am using my LEARN to teach and share too!

In the first couple days of 2012, LEARNing Photoshop was a major goal of mine, and then it was pushed slightly aside when I was the LUCKY winner of a Silhouette Cameo die cutting machine on The Today's Creative Blog!  I was SO excited to win, that organizing my scrapbook studio and making a space for my new toy on my crowded tables became a more urgent goal!  And, now that the Silhouette has arrived, LEARNing it's software has become my most pressing creative goal!  I am SO happy that the software is easy to use (I have previously used the Pazzles Pro software, so it may have come quicker to me that it might to others).  I LOVE being able to download cool designs right from the Silhouette website for only 99 cents!  I have used the $10 download card included with my machine to grab a few die cuts for my Roundup workshop and I'm excited to share them with everyone who attends!


Now that my studio is more organized, I find it's easier to run up here and cut a few shapes or finish a project.  (Another goal of mine is to finish some projects that are half finished and filling a box under my table...having that box empty at the end of 2012, would be an amazing accomplishment!)  I am also hoping that having things more organized will allow me to get started on a project I have been procrastinating since November.  I am creating a custom album for a friend, I think I my reasons for procrastinating are both emotional and then just plain procrastination.  This album is very personal to me, being a celebration of a close friend's life.  Brent died in 2003 and thinking about creating this album gives me feelings of joy, being able to honor someone who is so important to my family and feelings of sadness at the memories being in the past.  But now that I have the perfect space, I will press on and find joy in remembering someone so special.

I'm confident the book will turn out beautiful and hope that it will be the beginning of a new chapter for me, creating custom albums at home in my studio.

In order to keep my word, LEARN, foremost in my mind during 2012, I have signed up for the One Little Word class, taught by Ali Edwards, over at Big Picture Classes.  I signed up a bit late, so I'm still getting my book started, but I think that the little exercises aimed at getting to know my word and making it part of my life will be perfect lessons for this year!  I am excited at the idea of exploring my word a little bit each month!  I promise to share what I'm "learning" about my word this year.  I'd love to know what your word is for 2012 too!  So leave me a comment & we can chat! ;)

I've also decided that I need to LEARN to knit this year!  During January, I have been able to learn one stitch...the knit stitch.  I'm not pushing myself and I'm not sure how far I will get on this journey this year, but I'll keep you updated!

Friday, September 23, 2011

Layout of the Week: Halloween Headstone

Even though it seems like summer only just arrived here in Oregon, the calendar says it's time to get ready for Fall!  Never one to miss out on seasonal decorating, these extra large pennant banners just jumped right out at me during the EK Success Craft Fest this fall in Portland.

These large arched chipboard pennants are 10" x 16" and when flipped upside down it just screamed Halloween headstone!


I gathered some fun Halloween papers & embellishments, some new, some older...


I think I used all these papers, except the tiger stripe.  After laying everything together and deciding which to use, it just didn't seem to fit into the look I was creating.  For my first step, I used the Soot Ink Pad from Tim Holtz, rubbing it along the sides and over the enter front of my headstone.  Then I cut strips of paper and attached them with spray adhesive, before adding some fun embellishments like self adhesive strips, ribbon, twine, a tag from 7 Gypsies, punched bats and a piece of jack-o-lantern flair.  We're planning to use the Halloween Headstone as a fun place to attached little notes in our booth during this weekend's Scrapbook Expo.  After the Expo, I'm planning to add some orange glittered THICKERS announcing Happy Halloween!


Tips:

Sand double layer cardstock, such as Core'dinates, to add a distressed look to your Halloween projects.

Don't be afraid to give your tags a distressed look too!  Wad them up & rub with ink to give them that "just found in the haunted house" look.

Trim your patterned papers and lay them over another coordinating pattern.  This diamond pattern takes on a banner look when trimmed.

Punch a strip with your favorite punch and mount it over a thick ribbon for a custom embellishment!  The bats have also been sprayed with Luminarte black shimmer mist (difficult to see in the photo) for and added texture.

Supplies:
Paper Accents
Tim Holtz Ink Pad
Papers-Teresa Collins, Authentique Paper, Core'dinates
Various Ribbon, Paper Twine & Yarn
Tag-7 Gypsies
Spritz-Luminarte
Sticker Strips-K & Co.

If you're looking for other creative Halloween inspired ideas, stop by Today's Creative Blog for Get Your Craft On Tuesdays.  100's of creative types submit their creations each and every Tuesday, I'm sharing this project and I'd love to see yours over there too!


Monday, June 6, 2011

Party Favors the Kids Can Make...


If you're like me, you're getting tired of spending all the time and money to throw your kids wonderful birthday parties only to be left wondering what kind of fabulous gift you should spend even more money on to send home with each little party go'er...

Well, personally, I'm trying to move away from the party favor/gift bag craziness.  Last year for Delaney's party, we had a great American Girl Craft Party where the girls made their own favors as part of the party.  And the year before that, we had a Tie Dye theme for Delaney's party where the girls tie dyed a shirt and wore it home as their favor.  (Click HERE to see the mini album I made featuring all the fun of the Tie Dye party.)

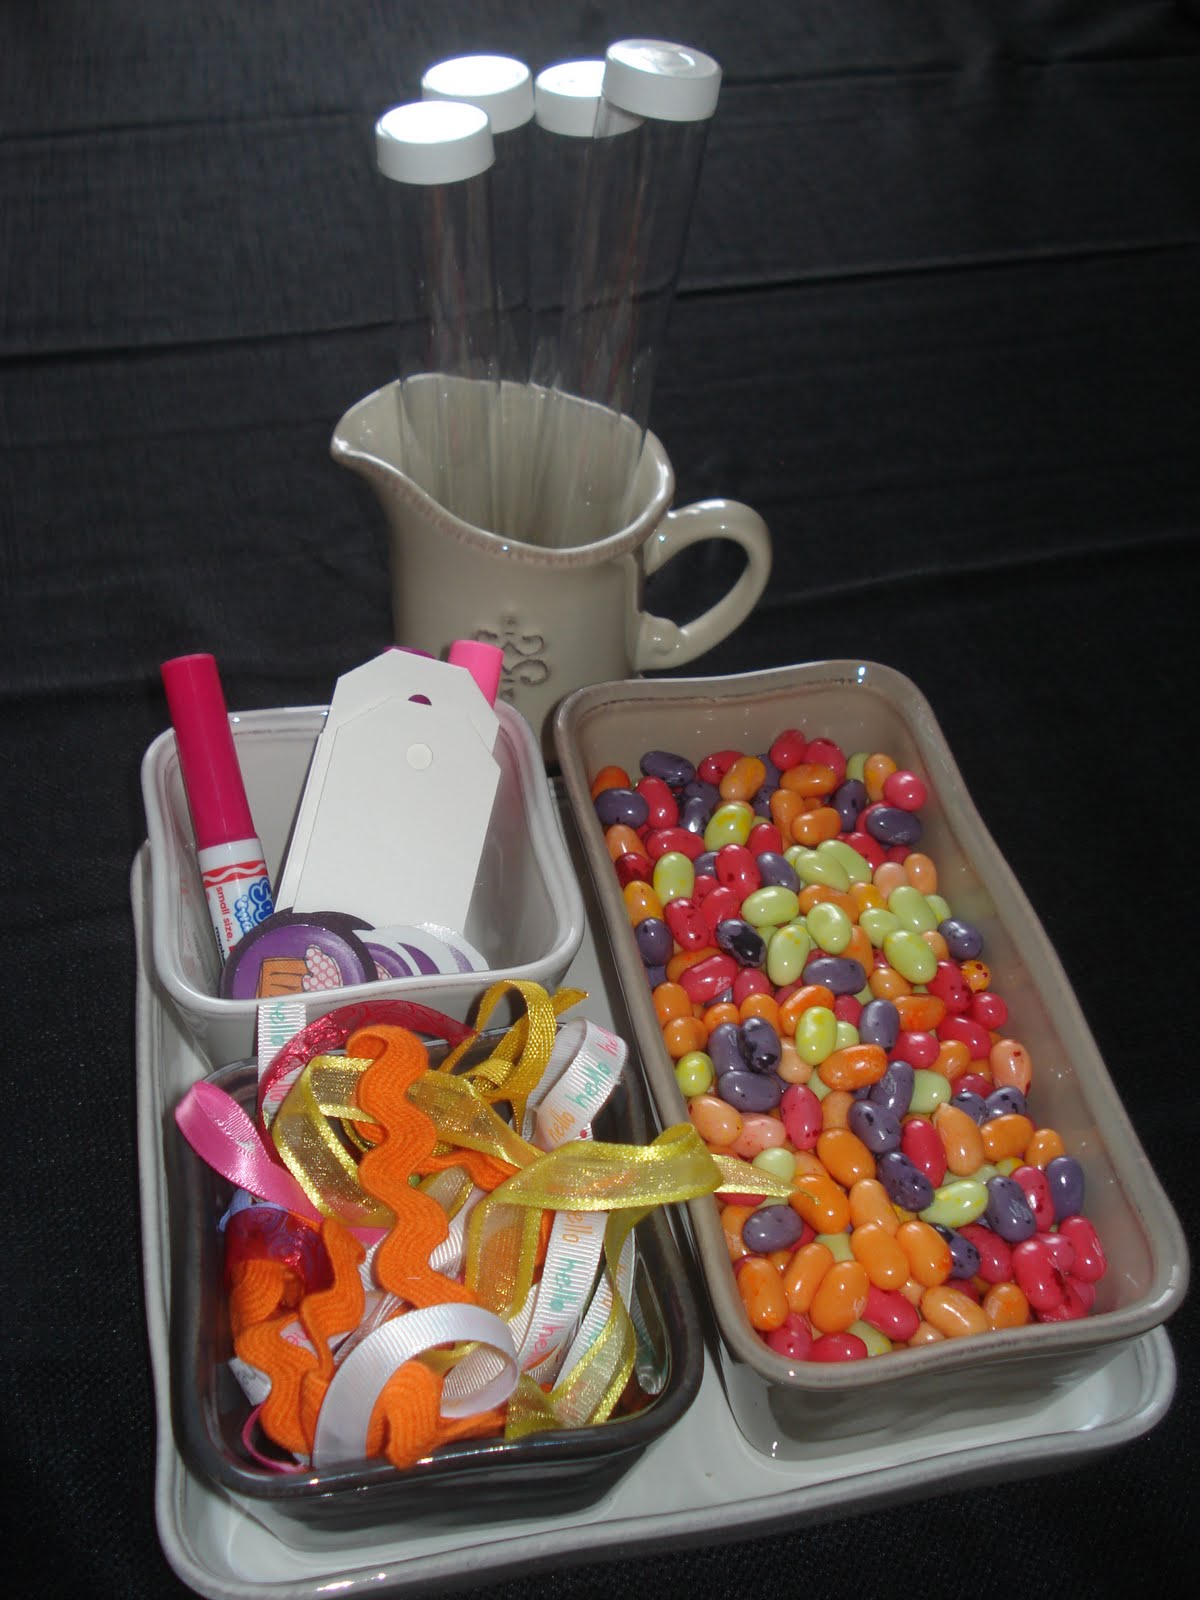
This year, Delaney wanted to take three friends to dinner at Benihana and then back home for a sleepover.  Since dinner was going to be pretty expensive, I wanted to do some cheap little favors for the girls.  While I was thinking about my plan for the party, we got in some fun little tubes at the scrapbook store where I work.


The tubes are about $1 each at the store and are about 1 1/2" in diameter and 8" tall.


We gathered our supplies. (Of course I used my new favorite Willow House piece, the Riverstone Tapas Set...so useful, but I digress!)  Delaney wanted some fun bright colors for the tubes, so she chose Jelly Belly Jelly Beans in the colors she wanted (frankly the most expensive part of this project, you could choose any little candies that fit in the tubes).  Then we used some extra ribbons we had at home and a few little spools of $1 American Craft ribbon from the store.  I punched the tags with my large tag punch and printed out some cute cupcakes from a the Crystal's {Playground} elements pack, a digi scrapping pack I got over at JessicaSprague.com (I made the invitations from this same kit, I'll share them soon.)


Once Delaney had all her supplies, I left her alone to make up the favors while I finished cleaning the house.  I did have her let me know when she finished a step, so I could hurry in & shoot a photo or two.  Delaney's 10, but I definitely think that 7 or 8 year olds could do this project by themselves or as a fun activity during the party.

In preparation, we cut the ribbons in about 4" pieces and wrote the girls' names on the tags.

Then the fun began....

First Delaney filled the tubes with jelly beans.


Then she added the cap.


Next, she tied a few ribbons around the tube, adding a tag to the top ribbon before tying it.


Such a fun, simple & inexpensive party favor!  Give it a try for your next party...birthday, graduation, 4th of July, Halloween...the variations are only limited by your imagination!


My Birthday Girl had a great time with her friends & everyone left with a sweet little memory of the party!

Remember to join me over at Today's Creative for the "Get Your Craft On" link party every Tuesday!  If I'm not posting, I'm over there hanging out seeing what the creative ladies are sharing every week!


Todays Creative Blog

Friday, May 20, 2011

Layout of the Week - Quick & Colorful


Some projects are just for fun!  This is one of them.  I've always been wanting to try more of the fun tints on the Costco Photo Center website and this seemed like a fun photo to use.  I love the whimsical look of Andy Warhol's pop art and so does Delaney.  She took an art class last year where she got to create some very cool pieces of pop art!  Thanks to her, I have all sorts of fun, bright pieces around my home.

Since she turned 10 this Spring, I used this photo where a "10" appears to be coming out of her head...don't even remember where this was taken, but it's a fun photo!  Then I used the tints in the editting menu on Costco's Photo Center website to change the colors, saving a copy of the original and then going back to the original and doing it all over again for each color.  I printed each tint as wallets (you get 4 of the same photo, wallet size, for 39 cents...a GREAT deal, if you ask me!)

Next, photos in hand, I headed to Whimzee's to see what I could find.  I knew that my layout needed to be a simple one, with simple papers & embellishments.  I started this project with my ribbon chosen...we needed a sample at the store using this fun white felt flower ribbon from Creative Cafe, so I started with a couple pieces of it.  To add a little texture, I chose the white Bazzill dot paper with it's embossed texture.  Finally to mix in just a bit of color, I used some KaiserCraft rhinestones in colors that matched as closely as possible to my tinted photos.  I ended up with green, blue and red.  I was hoping to find an orange or gold rhinestone to match my sepia photo, but we didn't have any at the store.  So I used what I could find and spaced them out in the centers of the flowers with a few spaces in between.

For a simple layout design, I decided to arrange my photos "Warhol Style" in a square (I know it's a rectangle, but square just sounds better.)  I added a few rows of the ribbon and filled some of the flowers with the rhinestones & I was finished.  I love the look and the layout was super quick.  It's a fun design to use with any photos you have.  Just print out some wallets or crop your photos to wallet or small square size, grab your ribbon and you'll have a finished page!

I know some of you purists will notice I don't have any journaling...but I don't think every photo or layout needs journaling.  Sometimes just a photo or 4 photos tell the story!

Have fun scrapping!

Stop & visit me on Facebook, where I'm putting together a new page for the JulieChats Blog!


Tips

Use a group of 4 small photos and some ribbon or paper strips to create a simple, quick layout.

Try some tinted photos on your next project!

Don't feel like you always have to use tons of printed paper or lot's of color, sometimes neutrals & a little burst of color is all you need.

And DON'T worry if you don't want to journal every page!!!  It's YOUR page after all, there are no rules to scrapbooking!!!

Supplies

Bazzill Dot Paper
Creative Cafe Felt Ribbon
KaiserCraft Rhinstones
Costco Tinted Wallet Photos

Monday, May 16, 2011

Summer's Coming Tablescape

I feel like I'm in the slow lane on the way to Summer...it's taking FOREVER for any Summer weather to arrive here in Oregon.  So I've decided to turn up the heat and get creative.  When the box arrived with my Villa Appetizer Tray, it was just the inspiration I needed.

I combined the tray with a couple of my other Villa pieces to create a light, Summery centerpiece that creates a peaceful feeling with natural, neutral pieces.

By adding a piece of burlap as a table runner and tossing some shells in a pair of martini glasses, you can create a breezy summer look on your dining table or just a fun vignette on a side table.

If you're decorating your dining table, you probably need more than just one small tray for your centerpiece.  If you have two matching trays, great!  Use the second to create this same look and you're ready to go.  If you're like me and have just one tray, look through your dishes for two small ones that will give the other side of your tablescape a similar look, and use the same martini glasses and shells to finish the look.  One side balances the other out, even though they are not exactly the same.


I used two salad plates for my grouping opposite the tray.  For a nice balanced look on a medium size dinner table, place the tray grouping in the center of the table and one plate & glass grouping on either side.  These salad plate/martini glass pieces would be perfect as singles on small tables or in a row on your mantel. (Maybe I'll try this for my next mantelscape...hmmmm....)

Now, if you're trying to fill a larger dining table, like I was, think of the tray grouping and the two salad plate groupings as the right & left sides of your centerpiece.  For the center, look for a larger basket, bowl or similar container.  The exact size isn't nearly as important as the look of your container.  If you have a piece that matches the other bases you are using in this arrangement, perfect!  But it's fine if you don't, too!  I didn't have a larger piece for the center of my tablescape, so I chose a large hammered bronze bowl as my center container.  I think a large basket would look wonderful here also, in keeping with the neutral colorscheme.  I used this Cyprus Footed Bowl for my tablescape's center.  And to add a little height to the center of my table, I added new favorite thing, the Villa Pedestal with some shells and a chunky summer potpourri surrounding it and a large shell sitting on a bronze candle stand to top it off.


This center grouping can also stand on its own in the center of your table or on a side table.  Combined together these smaller groupings created a beautiful centerpiece on a large dining table.


Remember some of my favorite tips for creating great centerpieces for your table:

Find a color scheme that blends well with your room.

Think of the scale of your room...use larger pieces in larger rooms or rooms with high ceilings and smaller pieces in smaller rooms.

Use smaller, shorter items one the ends or around the edges of a larger center piece.  Then place larger items, progressively toward the center.  Picture creating centerpieces as creating a triangle or pyramid shape with the tallest items in the center.

Think in 3's...groups of items in 3's (or any odd number) are most pleasing to the eye.  For my Summer tablescape, I used 3 separate groupings...the Villa Tray serves as one, the Villa Salad Plates serve as another and the Cyprus Bowl serves as the third.


If you're looking for fresh, summer look, think neutral and stop by your local craft store.  Grab some of their economical burlap for a table runner and a few bags of their bargain shells to fill your containers.  Look around your house for some neutral dishes and containers.  White, ivory or brown would look great with this colorscheme.  Also, a natural basket or two would mix in nicely.  And instead of martini glasses, grab a few of your wine glasses to fill with shells.

If you need some decorating advice...just ask!  I love to help people organize and decorate their homes, just let me know what you'd like help with and I'll work on a post just for you.  I hope you get a few minutes to take a break from all your work and create a more beautiful space in your home.

Find most of the pieces I used in this tablescape over on my Willow House page. I sell these beautiful home decor products and I also share them & more decorating tips on my Willow House Julie page on Facebook. Stop by & visit when you get a chance.

And stop back here soon to see my next Layout of the Week project! Trying to decide which will be next...a Bella Blvd. project or one designed with Webster's Pages???? Hmmm..we'll see! :)

Have you made something lately & posted it to your blog?  If you have,  you should check out the creative links at Made You Monday over at Skip to My Lou....


Join me over at Kim's for THE BEST Linky Party on the web...Tuesday's Get Your Craft On @ Today's Creative Blog.  You'll find all sorts of great crafting & decorating projects, many with DIY tutorials.  Be sure to leave Kim a comment to let you know what you think and tell her Julie sent you :)

Get Your Craft On Tuesday

Monday, May 2, 2011

Layout of the Week - featuring Bo Bunny's Ad Lib Collection

I'm on a streak right now...two Layout of the Week posts in a row!!  This week, I'm featuring a layout I created with paper & embellishments from Bo Bunny's Ad Lib Collection.  This collection features some fun printed papers decorated with turquoise blue, creamy yellow, grass green & a nice cantaloupe-y shade of orange.


Lately, I've been creating a lot of one-photo layouts and the paper I chose for my background here works perfectly with one photo.  This photo is one of my favorites from last summer's trip to Seattle.  Delaney took this self-portrait of us on the Seattle-Bainbridge Ferry.  I mounted it on Bo Bunny's Licorice Flourish paper from the Double Dot Collection.  I trimmed the floral and dotted papers to use as embellishments.  Next I used two 2" x 12" strips of the Turquoise Stripe paper, also from the Double Dot Collection.  I punched one edge with a Wavy Dotted Scallop edge punch from EK Success.  Then I put the strips through my paper crimper and folded it to look like a pleated ribbon.


For a finishing touch, I added the Bo Bunny Ad Lib Trinkets to the upper left corner of the photo and a little fluffy orange yarn on each side.

Tips

For extra embellishments on your layouts, trim out a few of the graphic elements.  They add some texture to your layout and are very economical embellishments too!

Dig out that old paper crimper & use it to create a ribbon look with paper strips.  To give your layout an up to the minute look, use an edge punch to help your paper ribbon stand out even more.

And I know I've said this a million times, but use a black & white photo!  By printing in black & white, you can make any one of your favorite photos match any one of your favorite paper collections!

Supplies

Bo Bunny Ad Lib & Double Dot Printed papers
Bo Bunny Ad Lib Trinket embellishments
Embroidery Floss and Yarn, vendor unknown

Tools

Fiskars Paper Crimper
EK Success Punch

Join me over at Today's Creative for the Get Your Craft On Tuesday Blog Hop!

Get Your Craft On Tuesday

Thanks so much for stopping by to visit!  I'd love to see what you think of my blog, so if you've got a sec, leave me a comment.  And if you have another sec and are interested in decorating, stop by my Willow House Julie page on Facebook & click "LIKE" to get bargains & decorating tips every day.  Thanks so much!

LinkWithin

Related Posts Plugin for WordPress, Blogger...