Friday, December 31, 2010

A Fresh Clean Look for Your Mantle to Carry You Through January

Now, don't get me wrong...I LOVE Christmas just as much as the next decorating-happy lady.  But there is also something to be said for taking down all those colorful decorations and replacing them with something streamlined, something fresh, something that creates a calm feeling after all the excitement of the holiday season has slipped away into your memories and hopefully a scrapbook page or two.


As we move deeper into winter and see the sun less & less (I live in Oregon, so it's pretty dark around here this time of year.), I decided to add a little light to my mantle.  In a family room with dark red walls and a lot of black accents, a shades of creamy ivory seemed like the way to go.


I like to carry a theme across my mantle while varying the heights of my display pieces.  Ivory candles and stoneware pieces combine to give a calm, peaceful look to my mantle and serve to create my theme.  For a touch of whimsy, I added a bust my daughter created in an art class to the mix.  And to bring a little nature inside, I added some evergreens from the yard and natural spheres.


To add some height on the right side, I added a luminary and some more greens from the yard atop a dark pedestal.  Using the ivory items in combination with dark iron accents and shiny glass pedestals.

When I create displays for my mantle, I try to follow a few simple tips:

Choose just one or two colors.

Use items of varying shapes, sizes & heights.

Add a little something from nature, even if it's a group of silk flowers.

When arranging my items, I try to space items of the same color across the mantle, leaving space between them.  I like to see a little of the wall color between my items.

Using dark color items or items made from dark metal in varying shapes adds a nice texture to the display.

Use some of my tips the next time you create a new display for your mantle, I think you'll be pleased with the results.

Find some of the items I used to decorate my mantle on my Willow House Website.  And look for more decorating tips on my Willow House Julie Facebook Page.

From left to right on my mantle are these current Willow House items:

Villa Footed Server

Drake Firefly Lantern
(Set of 2, I used one.)

Estate Trivet Trio
(Set of 3, I used one.)

Stiletto Pedestals
(Set of 2, I used both.)

Rosedale Planters
(Set of 2, I used both, one here & one on the far right.)

Villa Stoneware Salad Plate

Amira Luminary
(Set of 3, I used one.)

Tuesday, December 28, 2010

A New Year's Centerpiece & A Bloggy Resolution

Happy New Year!

I can't believe that 2011 will be here in just a couple days.  2010 was an eventful year around here, and I'm sure 2011 will have its share of surprises too!  I'll be back soon to share a year end wrap up and more about my plans for 2011.  But for now, I'd like to put my first 2011 resolution in print.  "I, Julie from JulieChats, will do my VERY BEST to post every week here on my blog, sharing something creative to inspire my readers to pull out their papercrafting supplies or do a little something to beautify & organize their homes."


This week, I'm getting a jump on my resolution by sharing a centerpiece I've created to celebrate the coming New Year.  To me, silver is the color of New Year's.  And since I use a lot of red & green in my Christmas decorating, it's fun to pull out some of my blue items to combine with the sparkle of the silver.

To create my centerpiece, I took a tour around my house thinking about things that would create fun silver & blue New Year's theme centerpiece.  Since starting my Willow House business in September, I've managed to collect some fun new items to use in my centerpieces.  I wholeheartedly believe in using items you already own with new ones to create a look for your home that's all YOU!  Mixing the old with the new also saves money, which is a big theme at my house.  So the new items I choose have to be versatile and useful in many ways, for many occasions, all over my home.  Getting them for free or at a discount is a HUGE plus too!

So on my little tour, I found one of my favorite Willow House items that I ordered in August, even before I became a consultant.  I chose to purchase the Cyprus Footed Bowl with Hostess Dollars from my 40th Birthday Willow House Party...so, it was FREE for me! :)  (Bowl was $59.96, now $49.96)  Then, I continued my tour and found two items from the new Spring/Summer 2011 Willow House catalog that I just knew would go perfectly with silver & blue.

I chose the gorgeous, Mediterranean Sage Bowl and the stately Stiletto Pedestal (I used the small pedestal, it comes in a set of 2 with a large & small version) (Set of 2 $49.96).

To fill my bowl and pedestal, I gathered silver & blue decorations from other centerpieces & arrangements around the house.  Fun silver garland with little stars, a silver string of beads discovered for less than $2 at the grocery store, one pick cut into 3 pieces featuring sparkly balls found at Michael's for about $1.50, 3 mirror-ball ornaments from Michael's (about $1 each), a collection of various small ball ornaments I've had for years, in shades of blue & white gathered from a Christmas arrangement and a silver, iridescent bead encrusted candle purchased years ago from Pottery Barn during a day after Christmas sale...I now had everything!


I started putting together my New Year's centerpiece.  First, I set the Mediterranean Sage Bowl inside the Cyprus Footed Bowl, to raise it up and give it a larger presence on my table.  Next, I placed the candle inside the Stiletto Pedestal and set the pedestal in the center of the Sage Bowl.  I ran into a little problem here, the center of the bowl is concave and the pedestal wouldn't stay in the center.  It kept sliding to one side or the other.  I thought about what to do.  If I had any of the little sticky stuff that you use to hang posters on the wall without damaging the wall, I would have tried to stick the pedestal to the bowl with that.  But since I didn't have any, I used a white fabric napkin, folded in quarters and placed in the center of the bowl.  When I set the pedestal on top of the napkin, it didn't slide around.  Now this isn't a really sturdy fix, but I'm not leaving the centerpiece where my 2 year old can play with it and I don't live in earthquake country, I think it will make it through New Year's Day just fine!  The napkin did stick out from under the pedestal's bottom, but I just made sure to arrange my garland and beads to cover it as I laid them around the bowl, circling the pedestal.

No, expert knowledge is needed to create this centerpiece.  Garland and beads are forgiving and since they sparkle, any arrangement of them looks great.  Just toss the garland in the bowl around the pedestal and lay a length of beads over the top, letting it fall into the spaces between & around the garland.  I did have a small piece of beading that I'd cut from the larger length in order to create a different arrangement, so I used inside the pedestal, laying it around the candle to give it a little more sparkle & another layer of silver.


Next, I placed the mirror-ball ornaments.  One of the design principles I've learned after years of doing my own decorating, watching tons of decorating shows and following even more decorating blogs, is that an odd number of items makes an arrangement that is pleasing to the eye.  And being a layout designer with some graphic training & a lot of scrapbooking experience, I know that using touches of the same colors or same shapes in a triangle pattern around your canvas, paper or container, helps the eye travel around your creation in a pleasing manner.  For me, it's easiest to use 3 similar or identical items and arrange them in a triangle.  So I did this with my mirror-ball ornaments, placing them gently into the garland and beads.  Next, I arranged the 3 picks in a triangle around the bowl, tucking the ends into the garland.  Last I took my small ornaments in various shades of blue & white and used them in little groupings around the larger mirror-ball ornaments.  I used the principle of odd numbered items here too.  While placing the small ornaments, I considered their color and tried to place each group of them in a triangular shape around the bowl.


TIP

Now, when I talk about placing the items in a triangle, I'm not saying that you should be exact and place everything very symmetrically into your centerpiece.  For this arrangement, I placed the smaller ornaments in a triangle around the bowl, nestling them in around the larger mirror-ball ornaments, but not in exactly the same spots, just in close approximation.  Check out my photo and look for the "same color" small ornaments to see what I mean.  The arrangement should have the colors and shapes, well placed to help the eye travel all around it, but it should also not be obvious that you were trying to create a triangle in your arrangement.  If it helps you to create a very symmetrical arrangement first, that's great.  Then try moving your elements around just a bit, so that they look like they just happen to have fallen into their places and weren't placed there with the precision of a magnifying glass & measuring tape.  It may take a little work to be happy with the placement of your elements, but I think that if you take a some time moving your elements and looking at them again & again, you'll find a look that's pleasing to you.

I hope you enjoy my centerpiece and learning a little about creating your own centerpieces.  Sign up to follow me or have my posts emailed to your inbox and you'll be among the first to learn more about decorating around your own home.

If you're interested in the items I used to create my centerpiece, please visit my Willow House Website.  And if you'd like to receive my monthly Willow House newsletter, featuring design ideas, recipes and the latest sale & special news, leave me a comment saying so here, with your email address.  I also have a Willow House Facebook page, where you can "LIKE" me and get fun decorating ideas & sale info. in your news feed.

Thank you for following JulieChats and I hope you enjoy my new creative direction.  I'm planning to share papercrafting ideas along with decorating tips & projects each week.  Stay tuned for all the news on my Scrapbook Studio reorganizing project.

The Mediterranean Sage Bowl is featured in the new Spring/Summer 2011 Willow House Catalog and will be available for sale January 1, 2011.  The bowl sells for $69.96 and is microwave, dishwasher and oven safe.  It is large, measuring 15" in diameter and 4 3/4" high.  In addition to creating a centerpiece in my new bowl, I used it to hold a big salad for Christmas dinner.

Leave comments here or email me at willowhousejulie@aol.com anytime.  You don't need to be invited to a party to order from my website 24 hours a day, 7 days a week.  And when you stop by my website and click "Shop Online," don't miss the Online Outlet featuring tons of mark down items and showcasing Weekly Specials that change every Monday.  Items will be delivered directly to your home and when you spend $40 or more (including regular and outlet priced items), you qualify to receive one regular priced catalog item up to $40 for 1/2 price.  So stock up on outlet items and get your favorite catalog item for 50% off!!!

Thursday, October 14, 2010

Welcome Back...Special Announcement from JulieChats

Welcome back to my blog!

After taking a break for summer and a major absence of creativity over the summer, I'm back.  I worked a crop at Whimzee's the other night and started working on a fun new banner project for my studio space.  I'll share it as soon as it's finished!

I'm not exactly sure of the reason behind my break from blogging.  I guess it started after my 40th Birthday Mexico trip with two of my closest friends.  Before that, I had been working very hard since January, at blogging, working at the store, volunteering at Delaney's school, house sitting for my neighbors and being a mom-wife-friend to those around me.  I was also forcing myself to complete creative projects in order to submit them for design team consideration.

Thinking about my "Words" for 2010, see post about that HERE, made me rethink what I was doing and how I was going about it.  My "Words" are BELIEVE and ACHIEVE.  After spending countless hours over about six months and not being chosen for any of the design teams I had submitted creations for, I thought I should reconsider what I was doing.

First of all, I love creating!  I love sharing my creations with friends, family and blog readers.  Also, not all of my creations are scrapbook pages.  I love creating beautiful things for my home and as gifts for others.  I love how the papers & embellishments originally created for scrapbooks can be used to create things that I enjoy seeing hanging on my walls and adorning my surfaces everyday in my home.

One day it occurred to me that no one was paying me to write my blog or create projects for it.  I knew that there were a few who would miss my posts, but I had to start thinking again about my goals for this year.  One of them was to make some money to contribute to my family's expenses each month. The more I thought about it, the more I realized that I needed to separate my creative projects from my desire to make money.  Being totally honest with myself, I had to admit that it would be very difficult (or next to impossible) to make much money as a scrapbook blogger.  I know that people do use their blogs to make money and I give lot's of kudos to them for their efforts.  But with all my other responsibilities, I didn't have the amount of time I thought I would need to devote to making my blog a money maker.

So while I took a "Summer Break" from my blog and enjoyed the long days at home with Delaney and Jake and also some summer travel, I thought about how I could help my family and get my "creative mojo" back.  I think that turning 40 this summer was also a part of my re-examination of my choices. 

Speaking of turning 40, I decided to throw myself a Willow House home decor birthday party.  I invited friends and had them skip the gifts and get something for themselves.  My gift was all the great free items I received as the hostess.  My consultant, Darby, is also a friend of mine from the scrapbook store and a mom at Delaney's school.  She's great at her business, starting out 7 years ago with Willow House's predecessor, Southern Living at HOME, Darby retired from teaching a couple years ago to concentrate on Willow House full time.  She's now a Director, inspiring a team of more than 40 women, and making a great living, even earning a couple free vacations each year.  So I listened when she suggested, nonchalantly, that I would make the perfect Willow House Design Consultant.


My love of home decor, design, color and creating, along with my retail background (I have sold so many pairs of jeans at The Gap, that it would make your head spin...along with 1,000's & 1,000's of pieces of scrapbook paper.) all combined with my desire to help out with the finances at home, all contributed to my decision to join Willow House as a Design Consultant.

Into my second month with Willow House, I'm very happy with my decision.  This job allows me to be home with my two year old, volunteer at school, be a good wife-mom-friend, make some money and even have some time left for my creative endeavors.  I'm still house sitting for the neighbors and working part time at the scrapbook store, so I'm a pretty busy lady.  But I'm now able to separate my desire to help out with the home finances and from my blogging and my creativity.

So, yes, I'M BACK!  I'm excited to create again and share some fun home decorating items with you!  So join me here at JulieChats, as I embark on a new journey in my life!  Of course, I welcome you to join me on Facebook, where I keep a Willow House Julie business page.  And also on my Willow House website.  I promise not to be one of those pushy sales people, but to share things that I think will help bring beauty, creativity, simplicity and organization to your life!  When you see something you like, you're able to order it on my website where the entire Willow House catalog is available for purchase, along with our bargain-priced outlet for those among you looking for a deal...I love a deal, so I'll be sure to share as many of those with you as I can!

I'll try to post some new ideas each week, check back here for posts to inspire your creativity and home decorating in the coming holiday season.  But I'm not going to push myself over the edge trying to be sure I post something each and every week, so if you'd like to receive an email reminder when I post something new, be sure to click subscribe to JulieChats over in the right side column of this page.

I look forward to sharing my creativity and passion for decorating with you!  Thanks for sticking with me through this long break!  I look forward to communicating with you through comments here and messages on my Willow House Julie page.  Let me know what you're interested in seeing here or things that you need help with around your home, I'd be happy to help!!!! :)

Friday, July 16, 2010

DIY...at Home: Summer Craft for Kids, Decorated Photo Frame


Just a quick note before I start with the frame instructions.

My daughter and I created these frames for her 9th birthday party. All the children had a great time making them after I had completed the first two steps for them. If you’re only making one frame and not ten, like I did, go ahead and let older children complete all the steps themselves. Allow an afternoon to create this project, as the paint and Mod Podge will require time to dry in between each step.

Instructions
Start out by opening your frame up (removing any backing and/or glass) and placing it face down on the reverse side of a piece of patterned paper large enough cover it. This paper will be the background for all your embellishments, so be sure it’s a pattern you love. Use a pen to trace around the outside and inside of the frame. Next, use scissors to cut about ½” inside each of your marks. The end result will be a doughnut sort of shape. Cutting inside will create a shape slightly smaller than your frame. In the next step, you’ll be painting the frame and you will want to see some of your paint around the edges of your paper.


Using a paper plate as your palette, apply the acrylic paint to your frame with the foam brush. Paint around the edges and center and then onto the face of the frame about 1” all around. Take the background paper you cut in the last step and hold it over the painted surface, just to be sure you don’t have any unpainted part of the frame showing through.

Allow the paint about an hour to dry.


Once the paint is dry, use a second paper plate as a palette for your Mod Podge. You can use either matte or sparkle Mod Podge for this step. But if you have both varieties, use the matte, since most of it will be covered by your paper. Since it’s slightly more expensive, you can save the sparkle variety to use as the top coat for the project. Paint the Mod Podge onto the face of the frame. Gently place the background paper onto the Mod Podge. Try to place the paper as close as you can to where you want it. You can move the paper around to center it, but do it quickly. The paper will soak up the Mod Podge as soon as it’s placed and will tear easily after that, so be careful. Once the paper is centered, use your fingers to gently smooth out any bubbles on its surface.


Allow about an hour for the project to dry.

Before adhering the flat embellishments in this step, it’s best to choose the ones you plan to use and then place them on the dry surface of the frame. Arrange them how you like, being sure to allow some of the background design to show through. These embellishments can be placed entirely on the surface of your frame or allowed to extend past the surface of the frame. In this step, use only flat, one-dimensional embellishments. Save your buttons, rhinestones, 3D stickers, etc. for the final step. The embellishments added in this step will be covered over with Mod Podge. Take your arranged embellishments and lay them down around the outside of your frame, near where you will place them. Paint Mod Podge over the area where you will place an embellishment, being sure to paint a space slightly larger than your embellishment. Place the embellishment into the Mod Podge. Repeat, painting the Mod Podge and placing the embellishment for each embellishment you have left to decorate the frame’s surface.

You do not need to wait or allow drying time before moving on to the next step.

Once your flat embellishments are placed in the Mod Podge, put a top coat of Mod Podge over the entire surface and edges of your frame. Now is the time to use the sparkle Mod Podge, if you have it, and were using matte to apply your paper and embellishments. After you have covered the edges and surface of your frame with Mod Pod, run your brush through the Mod Podge, one last time, in one direction. This step will create a smooth surface for your frame, removing any random streaking from your top coat.


Allow at least an hour for this surface to dry.

After your project is completely dry, apply your 3D embellishments, either with their own self adhesive backing or with Glue Dots. Placing these items on top of your last coat of Mod Podge will give your frame and extra, fun layer.

Fill your frame with a fun photo and display it where you will enjoy it most!


Supplies
Chipboard or Wood Photo Frame – There are several sources for these frames including your local scrapbook store, framing shop or local crafting center.
Mod Podge – Use regular matte and/or Sparkle Mod Podge. It acts as the adhesive and top coat for this project.
Patterned Scrapbook Papers – Find a group of coordinating papers that will look nice where you plan to display your frame, whether that place is your living room or your child’s bedroom.  We used the American Girl paper pad from EK Success to create our frames.
Embellishments – Choose a few embellishments that coordinate with your patterned papers, die cuts, buttons, rhinestones, 3D stickers, etc.  We used the American Girl Stacked Flowers & Embellishments pad, along with a pack of their stamps to stamp on some solid cardstock.
Adhesive – If your 3D embellishments (buttons, rhinestones, stickers, etc.) are not self adhesive, Glue Dots will be helpful to adhere these items in the final step.
Acrylic Paint – Use a color that coordinates with your papers and embellishments.  We used KaiserCraft acrylic paint in Magenta to cover our frames.

Tools
Foam Brushes – for applying paint and Mod Podge
Paper Plates – I use paper plates all the time for many different projects. Use them here as palettes for your paint and Mod Podge.
Wax Paper – Use it to create a space for your frame while using paint and Mod Podge. You will be able to easily remove your project even if the paint sticks a bit to the paper and no newsprint will be lifted onto your project.
Scissors and Punches


***Stop by & party with me Saturday night at Ann's Virtual Girls' Night Out Party!  She's moving it to Saturdays this weekend to help it stand out from all those other Friday night parties out there.  And maybe those of us who're chasing kids all day Friday will be a bit more relaxed on Saturdays!  See you over at Ann's!

Friday, May 21, 2010

DIY...at Home: Chipboard Mini Album Workshop

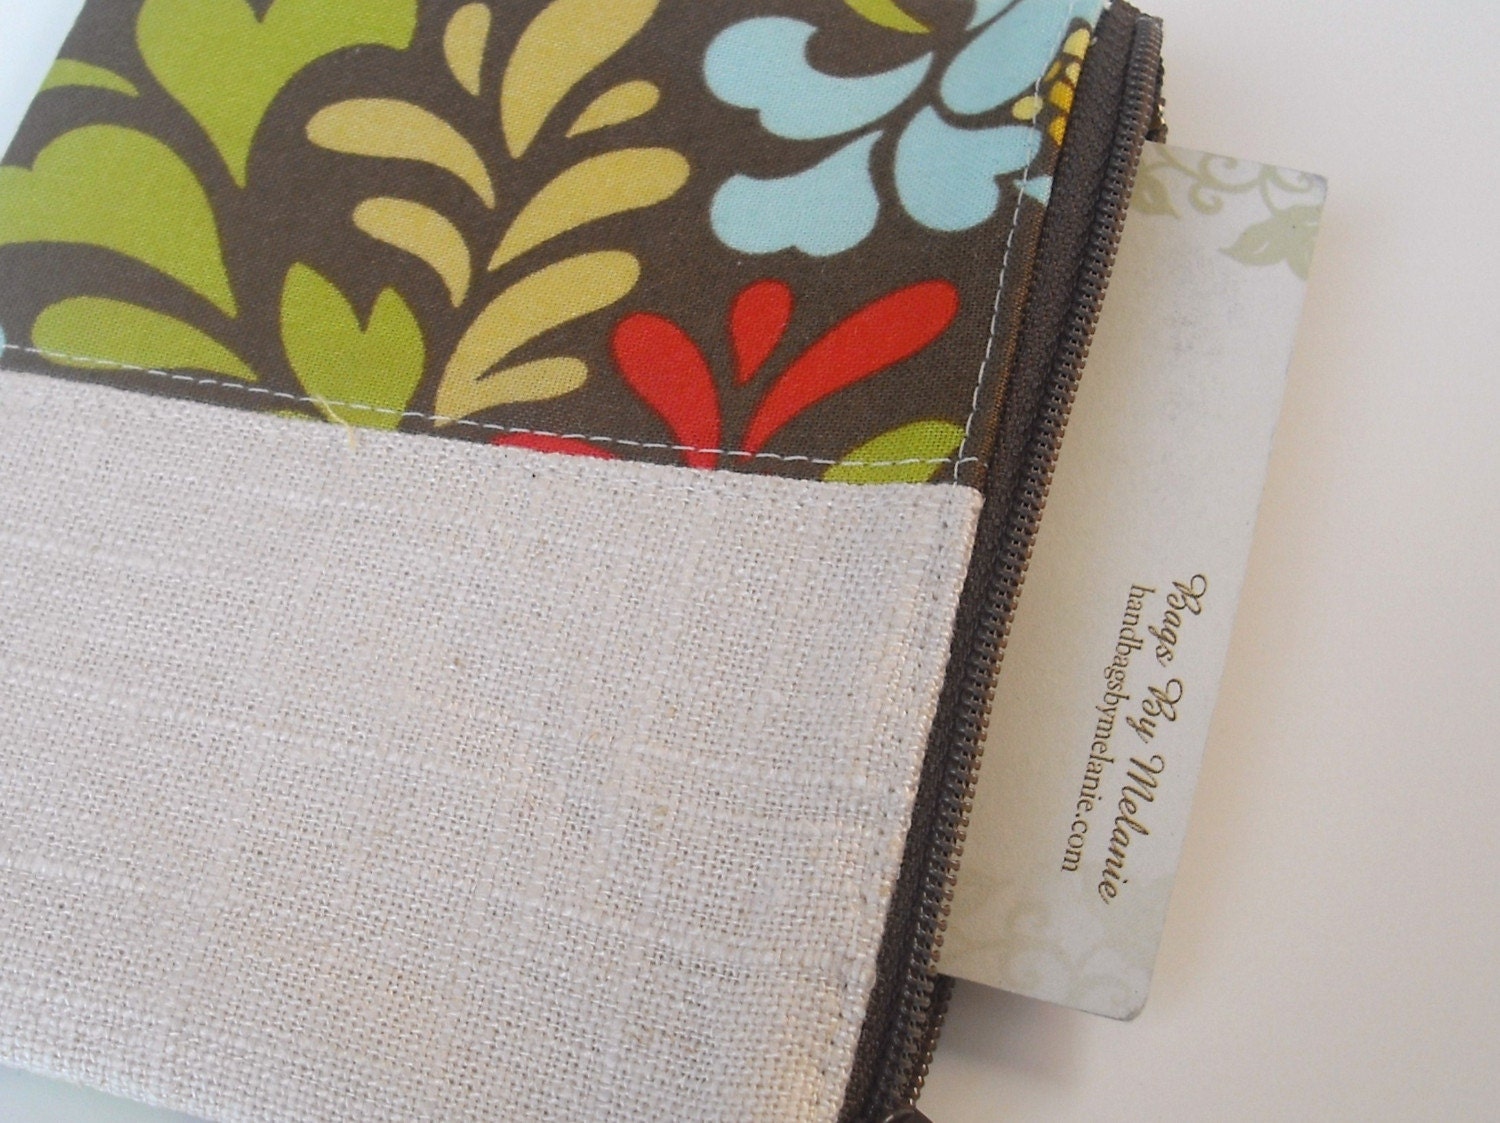
Right now I'm putting together the Tip Sheet for the Chipboard Album class I'm teaching tomorrow at the scrapbook store where I work, Whimzee's Scrapbook Studio in Beaverton, Oregon.  I originally wrote the parts of this post as a DIY class for the store blog.  As I was doing research for my class, I realized that I haven't put many classes (workshops, tutorials or whatever you want to call them) on this blog.  I think I'm going to start including some here, so everyone can see how I put together my projects and maybe they'll want to try something new.  I have a few on the store blog, so I'll probably use those first while I figure out what to share with you all next.  If you want to get a head start on the rest of the class, zip on over to the Whimzee's Girls Online Blog and click on classes down the right side column, I've got a few fun mini album classes over there.  I'm off to get everything together for tomorrow, so I hope you enjoy your Friday!  And don't forget stop by my friend Ann's Virtual Girls Night Out tonight, she's lamenting being older than PACMAN and I'm right there with her!

PART 1 - Gathering the Supplies


I want to share how easy it is to create a mini-album with a Bo Bunny My Word chipboard album. I chose the PARTY album. For your own project, feel free to choose any of their albums (or any other chipboard album that suites your fancy). The techniques are interchangeable between chipboard albums.

See all of Bo Bunny's My Word Albums and check out their completed projects on their website.  Click HERE for Bo Bunny's Tips & Tricks for these albums. 

I started with my PARTY album, Junkitz Salsa Celebration collection papers, Creative Imaginations Art Warehouse Candles & Cakes collection papers, craft paint, Creative Cafe rings, Blossoms & Leaves by Creative Impressions, any coordinating ribbons I could find.....and most importantly Spray Adhesive.

As far as tools, I like to cut with my large Fiskars paper cutter. I used my lime green Doodlebug Designs craft knife and cutting pad, it's so nice when things can be so useful and also so stylish! I used Glue Dots and Hermafix squares to attach the embellishments on my pages. I decorated my pages with Fiskars Acrylic Stamps, brown ink and numerous shapes cut out in the store on the Cricut using the Alphalicious font cartridge. I love the Cricut! We have it available for you to use in the store for a $2 fee. It's so easy to use and we have lot's of fonts for you to choose from.

So after collecting all of my supplies, I was ready to start the project.

PART 2 - Choosing & Adhering the Paper


First I take a look at both sides of each paper. I use double-sided papers for the Bo Bunny albums. I make sure I choose papers that are truly 12 x 12 inches in size. (Just a few of our papers are slightly smaller than 12 x12.) I trim any white strips from the edges, on these papers there were white strips showing the manufacturer & collection names, UPC, etc. Next, I cut each piece in half, forming a 6 x 12 inch piece. I sort them and flip them from front to back, just seeing which patterns I like together.

When you make one of these albums, you have to choose a paper to cover both sides of each letter. So be sure to look over your choices for, say the back of the P and the front of the A, to be sure they look nice together. It's possible to mix & match small prints with large, dark backgrounds with light. As long as you choose papers that coordinate, it makes no difference if the papers come from the same collection. For this project, I choose two collections that I like together. If you aren't confident you can mix the collections, lay everything you like together on a table in the store and see what you think. Don't be afraid to ask one of the Whimzee's Girls for help, or ask someone who's scrapping that day, everyone has an opinion and one person might see something another misses. If you want a fail safe, quick way to choose your papers, pick them from one large collection. Some of our collections are very deep in their choices. Some of my favorites are Bo Bunny, Basic Grey, Chatterbox, Cosmo Cricket, Little Yellow Bicycle and Reminisce.

After I choose my papers, I use spray adhesive to adhere the paper to the chipboard. I like to use spray adhesive outside or in the garage. Not only does it have a strong odor, but the over spray creates a sticky surface on everything it touches.....your table, floor, carpet, etc. I spray the front of each letter and carefully lay the paper I have chosen for its front over the adhesive, lining the edges of the paper with the edges of the letter first. Spray adhesive is a bit forgiving, so you do have a little time to lift the paper in case it isn't perfectly lined up on your first try. After you are happy with the position of the paper, lay everything on your table and press the chipboard firmly onto the paper. Set the letter aside and repeat the process with each letter. By the time you're finished with this process, the first letter should be dry & ready for trimming.

PART 3 - Trimming the Paper


Be sure to use your knife to cut out the paper covering the 3 holes in the end of each letter at this point.

Next, repeat the instructions in Class #2 for the back of each letter. Don't forget to remove the paper from the back sides of the 3 holes.

PART 4 - Painting the Edges


After you cut the excess paper from each letter, it's time to paint. Choose a paint color that runs through each page or one that coordinates with all of your papers. I use acrylic paint. I mix colors together to achieve the look I like. If you can't find a paint in a coordinating color, you might want to give mixing your own a try. If you aren't in to mixing, maybe black or brown would look nice with your paper, eliminating the extra step of mixing.
Instead of paint, you could use a small ink pad to ink the chipboard and paper edges. Personally, I like acrylic paint the best because an applicator sponge allows me to get into tight corners that an ink pad doesn't.
Once you have the paint you like, dip a paint applicator just barely into the paint. Touch the applicator to the edges of your letters, dragging it slowly along all the edges. I like a thin border of paint on the outside of my letters, so I just touch the applicator lightly along the edges. If you would like your border thicker, use a little more pressure when you drag your brush along the edges. After painting the edges, use the applicator along the inside edges of the letters with "holes" in them. (In this album, the P, A & R have inside edges)
Lay your letters on wax paper and wait for them to dry. Do be sure to look at both sides of the letter, so that you can be sure you have covered the chipboard edge up to the paper on both sides.
After the letters all dry, place the rings inside the holes and arrange your album. You can embellish the pages while the album is hooked together with the rings or take it apart for easier access.

PART 5 - Ribbon, Ribbon & More Ribbon


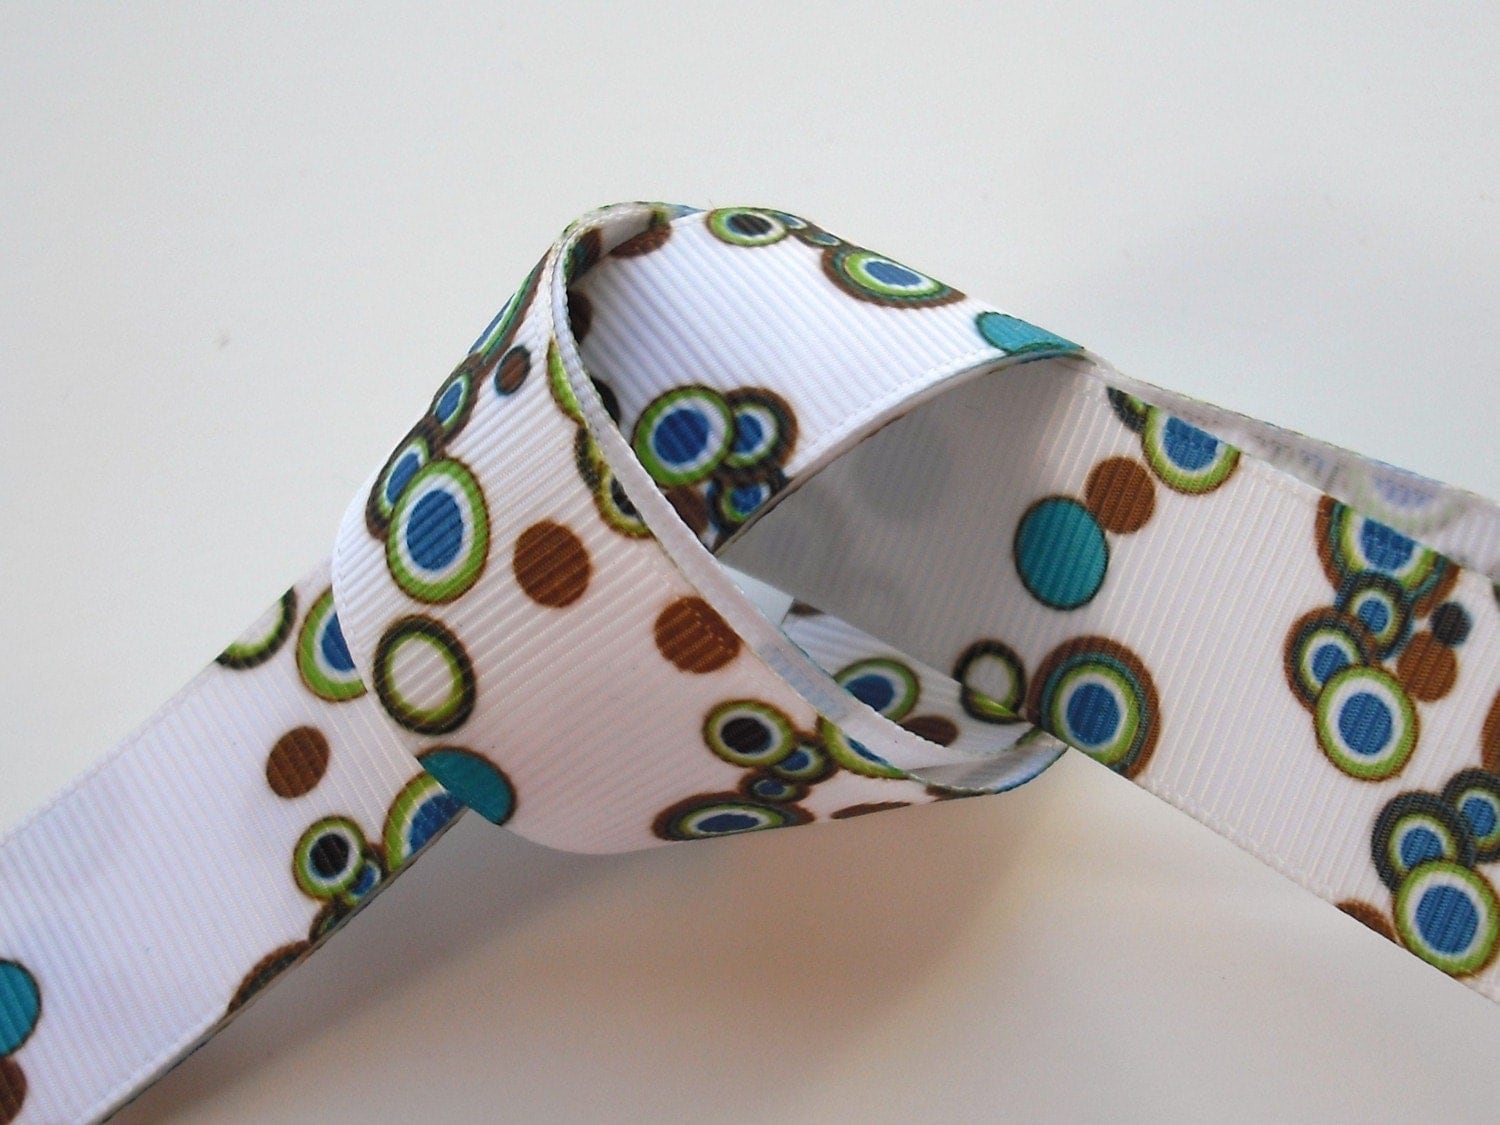
On of the things I love about the Bo Bunny My Word albums is that I can go crazy with one of my favorite embellishments....RIBBON! I like to squeeze in some ribbon where ever I can, in my projects. For this album, I chose lot's of white background ribbons with dots & words like...party, celebrate, birthday. I also picked some lime green shimmery ribbon, a red sheer ribbon with a swirl pattern and a medium blue rick-rack. I don't have too much rhyme or reason to how I pick the ribbons. I usually grab all the ribbons I can find in the store that are coordinate with my paper and make a pile of them on the counter on top of the paper. I try to pick a variety....pattern, solid, printed, shaped (like the rick-rack). I think a bit of everything mixed together looks great in a project like this.

I buy about a yard & a half of each ribbon for a project like this. Next, I cut the ribbon in 4 inch pieces. Since there are 3 rings, I cut three 4 inch pieces. I use the rest of the ribbon to tie on the letters and to decorate the inside of the album. Take your 4 inch pieces and tie them, one at a time, onto the rings. Being a type A person, I divide my ribbon so that each ring has a piece of each ribbon. You can do it however you like, really, one can have too much organization in her life! I just tie the ribbon around the ring once, so that there aren't too many big knots taking up room on the ring and I like the ribbon ends to be a bit longer.

For my PARTY book, I used 7 different ribbons. The number is up to you. If I found wider coordinating ribbons, I would probably only use 5 or so. I think it really depends on how many ribbons you find that you like. As far as ribbon goes, I'm not a "less is more" kind of girl!

PART 6 - Embellish it!


OK, now the fun part! Take all the papers & ribbons you have left, flowers, brads, and any of your favorite embellishments. It's nice to see everything at once, so you can decide what fits & matches with each page. I like to take ribbons & tie them around any edges I can. For this project, I tied ribbon around the A, R & Y. (NOTE: I liked the way the double sided paper showed through the holes in the P & R, so I left it this time & didn't cut it away when trimmed around all the other letters. Just check out everything before you trim to see if you might want to leave anything.) For this project, I used the Cricut at Whimzee's & its Alphalicious alphabet to cut out a name & some other shapes. I'm giving this one to my friend's daughter, Josie, for her 1st birthday, so I wanted to put her name & age on it. I stuck with the scraps of the papers I had already used for most of my inside pages, and I added a little coordinating cardstock. I also used a set of Fiskars clear stamps (a birthday set) and brown ink to add a little something to many of the inside pages. There were so many colors in these paper collections, that I thought brown would go with everything. And I wanted the ink to be subtle, something you might miss on first glance but would stand out after you took a few looks at the album.


So let's check out the pages:

Since this is a gift & I don't have photos, I took scraps from the project and cut shapes that I thought would work well as backgrounds for photos. I used a square & a circle on this page. You could put a photo in the circle or a little piece of memorabilia. I snipped a couple pieces of the party hat paper to use as decoration. Next, I layered two flowers together with a leaf and held them together with a small silver brad. Glue dots are the best way to adhere plastic items and ribbon to paper, so I used them throughout the book. I added a piece of ribbon, to the edge of the square photo, being careful to include the words "happy birthday" in my piece. I then closed the page and saw a little area of the A showing through and decided to put a little "make a wish" stamp in that space. For one last touch, I took a piece of dotted ribbon and wrapped it around the page, through the hole in the A, leaving the knot and long ends to show on the next page.

When I put the ribbon around the A, I used a large needle tool to poke two holes into the ribbon. I put one flower & brad in each hole and tied the knot in the ribbon. All that was left was to add a square photo background. I like to use the paper from the facing page to make a background. Since I already made sure the papers coordinated, it was easy to pick the facing paper for this page. And on this page it was extra easy...the paper on the back of the A is the back side of the paper on the front of the R. As far as embellishing the front of the R, I went a bit conservative here. Since the back of the A is pretty busy, I placed one background (see, it's the facing paper again) and a small piece of green ribbon on this page. I like being able to see some of the words on paper that has so many words. I did use another stamp with brown ink here. Near the top of the brown box, I stamped a group of balloons that peeks out when the book is closed.


On the next pages, I love these dot patterns and wanted them to stand more on their own. I used the back sides of the papers as photo backgrounds. On the left, I placed two pieces of ribbon under the background with the words "birthday" and "party" sticking out. For the right, I used one large photo background and one small square with a stamp and a plastic flower & silver brad in the corner. I like the look of all the dots in circular patterns covering these pages.


For these pages, I used two different photo backgrounds. On the left I chose the party hat paper and cut it about an inch larger than I originally thought I needed. I used the extra room to place two thin yellow paper pieces, stamped with birthday sayings, placing them on the left and bottom. I used two flowers and brads, one on each piece of paper in the extra space at the ends. For the right side, I used pink cardstock, cut a little long, with a stamp along the edge. For a little extra zing, I put three pieces of ribbon, folded in half under the side of the background with the edges sticking out. On this page, I used the pink dot paper to cut a large "1" & small "st" on the Cricut and adhered them so that they could be seen when the book was closed.


For the back of the album, I used a turquoise dotted piece as a background, cutting it extra long along the top. To give the impression of a gift, I tied a ribbon on the side of the paper with the knot at the top. Then I used a few last flowers, layered two on a brad, and arranged them in a triangle on the left side.

I was excited to finish the project and can't wait to have my friend unwrap it for her daughter and use it to showcase the photos from her first birthday. I love the Bo Bunny My Word Chipboard Albums. And I think that whoever receives them as a gift will cherish them as keepsakes for years to come!


Photobucket

Friday, May 14, 2010

Layout of the Week - Our Peaceful Free Spirit

Sorry I've been away from blogging for so long!  I've been in a bit of a funk for the last few weeks.  Just a combination of coming back to the rainy weather from tropical Mexico, not getting enough sleep, lot's to do at work & school, mortgage issues (don't get me started on this one...) and wondering where my time would be best spent.  You know, those problems all of us have.  But this week I decided I was going to get out of my funk, start working out again and try to get back to my regular routine...at least until school is out for the summer and it all blows up in my face again!  The appearance of the sun here in Northwest Oregon definitely helped urge me along in my effort to get back to normal.  A little sun can do wonders for your mood!

So I'm back at the blogging gig!  And I have a layout to share with you that matches my newly sunny mood this week!  I create this one during my stint working at our National Scrapbook Weekend Crop.  I had been looking for the perfect papers & embellishments for these photos of Delaney we had taken at Sears.  She's wearing her favorite birthday outfit from her favorite store Justice.  She's really into t-shirts & skirts, bright colors, peace signs & a little bling.  We love how these photos turned out...just like a magazine ad!


Tips

Save money and create a beautiful double page layout by cutting a large die cut in half and placing one half on the inside of each page.  The great die cut effect is now part of both of your pages.

Add a fun embellishment by using die cut felt self-adhesive ribbon trimmed into pieces & added to your projects.

Try tearing & sanding your Core'dinations cardstock!  The inner layer of these great textured cardstocks comes in lot's of great colors that can be revealed by tearing, sanding & embossing.

Supplies

Little Yellow Bicycle Free Spirit collection papers & stickers
Core'dinations cardstock
Kaisercraft Fozz Felt Ribbon
Prima paper flowers
Boxer buttons

I shared this Layout of the Week...

with Today's Creative's Get Your Craft on Tuesday


and with the ladies at Ann's Friday Night Virtual Girls' Night Out

Photobucket

Tuesday, May 11, 2010

Making Time to Be Creative

Check out my latest article published on the Oregon Women's Report Website!  I thought I'd share a few of the ways I squeeze my creative projects into my busy days.  I'm always looking for new ideas, so share the ways you manage to get creative in the comment section!  I'd love to hear from you!

Making Time to Be Creative

Posted using ShareThis

Friday, April 23, 2010

Layout of the Week - Punky Posh Mini Album with Punky Sprouts & Chatterbox Part 2

I thought I'd share a few detail shots of the album I featured last week.  I'm still in love with this album.  I have some more ideas for creating a totally different look with this same album.  I did make another of Punky Sprouts's albums last week.  And after I return from my relaxing vacation to Mexico, I'll share it with you.  I'm in Mexico as you're reading this, hopefully laying in the sun sipping a margarita celebrating 40th birthdays with a couple of my closest friends.  I don't have my 40th for a few months, but we're all going to celebrate all year...there's no law against that...is there?


I like to embellish these little mini albums with all sorts of things.  For this one, I added some tags, ribbon & twine.


I liked the burlap page I made so much, I added a little scrap to the cover.  It was fun piling things on the cover over the dry brush painting I had completed earlier.  I think the date tag is a great idea, it's always fun to remember the exact date of an occasion.  The felt birdie was a fun last minute addition when I thought the empty space was a little too much.


For Delaney's page, I created a girly look...sparkly glitter paper, velvet flocked paper with a scalloped edge, pom pom fringe, ribbon and a butterfly.


I created my own page to add to this album, trimming burlap and using a zutter hole punch to create the holes.  I thought the rough texture suited a rambunctious little boy!  I added the bit of ribbon on the right at the last minute, just pulling on the burlap's twine pieces to create a space to weave the ribbon.


This was my quickest page of this album, just a square of lime paint to frame my photo.


This page probably took the longest to create.  I wanted a brown canvas page, so I got some at my local sewing shop and cut two pieces the same size as the album's other pages.  I used my sewing machine and ivory thread to add the details.  I'm not very experienced with the sewing machine, so I tried out the scallop stitch on this project.  It's so nice that when we use machine stitching on papercrafts people don't expect or want perfectly straight lines.  This would drive my mother nuts, she's such a great seamstress and tried for years to teach me to sew.  But she was forever pulling out my mistakes and I finally gave up.  I'm excited I finally found a use for that sewing machine that was stuck away in a closet!  And thank goodness, I still have my mom to do the "real" sewing! :)

Oh, and I love the felt embellishments that Chatterbox made to match these collections, so cute and self adhesive too!


On the back of my canvas page, I stuck with little circle embellishments and a tag to create a boyish look.


This was another quick page.  Delaney is our artist, she loves all things creative.  So I just grabbed a foam brush, dipped it into the paints I was using on this project and randomly added touches of color to this ivory canvas page.  For a final touch, I added a little tag & some fun embellishments from my packs.


After the last busy page, I wanted to calm things down a bit.  I used the self adhesive felt embellishments on this one.


I love acrylic, especially when it's mixed with other types of pages.  For the acrylic, I painted the Tropical Water paint around the edges with a small, dry regular paint brush.  When you try this type of technique, don't be too perfect, the messy look is in! :)  I used a Crop A Dile tool to punch two holes in the right edge and then tied a couple ribbon knots as accents.


I like how the acrylic page looks when it's turned & placed over the photo on the left too!


This page is on the right behind the acrylic.  I used a patterned paper to cover this page and then placed a smaller torn, inked piece of foiled paper on the left.  Next I inked around the whole page and added a little garden twine on the left, as a fun contrast to the foil paper.


For a fun Jake page, I chose a checked paper and some star & button embellishments.


For my last Delaney page, I used acrylic stamps and my lime & tropical water paints to stamp some flowers onto the canvas.  It was fun adding a little tag & butterfly as a finishing touch.


Again I used the stamps and my two paint colors for this page.  For my little journaling, I used a letter stamp that creates an old fashioned typewriter still look.  I stamped, "At Home Together, Our Favorite Place," in brown ink.


This acrylic page was my biggest stretch yet....  I used a large Technique Tuesday stamp in Versamark ink and then added lime embossing powder and heated it with my heat gun.  Just let me tell you, this technique is not for the faint of heart or perfectionists out there.  The acrylic folded up all funny while I was heating the powder.  I was doing this page while I worked a crop at the store and boy everyone was nervous about how it might turn out.  I'm pretty sure they all thought I'd ruined the page.  But I grabbed two pieces of white paper and used them to help me flatten the acrylic back to its shape.   I think it turned out great!  It definitely isn't perfect though.  There are a few little spots of embossing powder that didn't get blown off the ink and created little green spots.  And the acrylic isn't as flat as I would like it to be.  But I love the look and don't really mind the bumpy-ness of the page.  What project is really PERFECT in the end anyway.  How would you know it's homemade if it's perfect!!!?


Here's the stamped, embossed acrylic page laying over the page to its left.


For my final page, I used the teal blue flocked paper, a bit of ribbon and a little monogram tag.

As you probably noticed, I used sepia tone photos again on this project.  If you've never tried them, you definitely should.  It's impossible for me to imagine how busy this album would be with color photos.  And of course the perfectionist in me loves when color schemes are in harmony in my projects.

You should also know that it's OK to just shoot some photos around  your house or yard and use them in a family album.  This wasn't a photo shoot, we were just hanging out outside in the yard on one of the few warm spring days here in Oregon.  I did get my mom to shoot the family photo, but the rest are just candids my husband & I shot with my point & shoot.  So don't worry about everyone matching and setting an appointment, just get together & take some photos.  Depending on your chosen papers, sepia tone or black & white can cover a million color matching mistakes!


I decided to skip photos on the back cover.  Just a little paint & a dry brush...the ribbon is tied around the whole page.

Supplies

Brown Cardstock - American Crafts
Patterned Papers - artsy.licious, Fabulous and Together by Chatterbox
Embellishments - Tags, Buttons, Journal Boxes, Ribbon
Kaisercraft - Acrylic Paint: Lime & Tropical Water
Ink - Brown Pigment Brush Pad by Color Box and Versamark Pad
Stamps - Technique Tuesday and Provo Craft
Embossing Powder - Zing by American Crafts
Ribbon - Various Manufacturers
Garden Twine - Unknown Manufacturer
Sewing Supplies - Burlap, Brown Canvas and Ivory Thread from Local Sewing Shop


A little note from Julie...I hope you're all having wonderful weeks!  I am in Mexico this week to help my friends celebrate their 40th birthdays (well, I'm celebrating mine too, albeit a bit early!).  I can't wait to see what I can find on my vacation to inspire my next project!  Have a wonderful weekend! :)

Sunday, April 18, 2010

Blog of the Week: Meet Melanie from Bags by Melanie

Today is the first day of a new feature here on JulieChats.  Whenever I get a chance, I want to feature other creative bloggers on my blog...every so often.  The world of creative bloggers is huge and I think it's a great way for us to meet other creatives from all over the world, so enjoy my first feature & check back soon for more....

I want to introduce you to a new friend of mine...Melanie from Bags by Melanie!  I met Melanie in a group I'm involved with in Creative Bloggers online community.  I'm excited to share Melanie's creations with you!  I love her litte bags, perfect for stowing your business cards in your handbag without bending them.  I've got to order myself one of these for those blog business cards I created a while back.


And for you scrapbookers out there, Melanie has a second Etsy shop she started with a friend to sell all those extra supplies left from their joint creative endeavors.  Stop by Blinky & check out all the fun crocheted flowers, ribbons & even Sizzix supplies.  I'd love to have some of their funky ribbons, this one is a favorite of mine...


Stop by & visit Melanie on her blog and in her Etsy shop!

If you're looking for a fun way to promote your creative blog, stop by Creative Bloggers and check out all the groups you can join.

LinkWithin

Related Posts Plugin for WordPress, Blogger...