Showing posts with label photography. Show all posts

Monday, February 17, 2014

Family Love Layout - Layout of the Week


This week I'm sharing another layout I created Plus Corp's CHA booth at the Winter 2014 show.  When I saw the new Vintage Camera Decorative Roller Stamp from Plus Corp., I almost jumped up & down!  I LOVE anything with a camera on it!  I immediately knew which paper I wanted to combine with this awesome stamp.  The Camera Bag paper from October Afternoon's Travel Girl collection was the PERFECT paper to complement the camera stamp.  Once I had the stamp and my paper, I headed to Whimzee's Scrapbook Studio (the LSS where I work here in Beaverton, Oregon).  I knew that we would have some great solids to coordinate for my layout.


When I first started planning this layout, I didn't know which photo I would use, only that I just HAD to make a layout with this super cute camera stamp.  I started to consider photos and realized that we had just had our family photos taken right before our Disneyland trip.  I have a friend who is an AMAZING photographer and a teacher too (in her spare time...ha ha!)  If you're in the Portland-Vancouver area, please consider her for your family and senior photos! Check out her website Stacy Major Photography.


I decided to use my shiny silver metallic paper as the background and layer gray and aqua on top of it.  I mounted my photo on a black matte and placed it on a horizontal strip of gray textured paper.  Next, I rolled my Decorative Roller Stamp with its cute cameras across a piece of textured white cardstock from American Crafts.  I really like the vintage look the textured cardstock gives to this stamp.  What would normally be a solid black impression is distressed using textured paper.  I worked at getting the stamp straight by laying my paper down next to a ruler and making every effort to roll my stamp perfectly along the ruler.  I think it took about three tries to create a camera strip to my liking.  And, just in case you have one of the Decorative Roller Stamps from Plus Corp. and are unhappy with the impressions you get at first, be sure to grab a piece of printer paper and roll the stamp around until your image is clear and perfect.  The images on the stamps I used did not come out perfectly on the first try.  Some black ink was printed in between the cameras and other images on the other stamps I used for my projects.  After rolling them around on printer paper a few times, the images began to come out perfectly clear with no black ink in between. To create a focal point, I used a vertical strip of the camera paper behind my photo, tearing and distressing its edges by rolling them back & forth between my fingers.  

Even though we are wearing gray and white in our photos, I decided to print my photo in black & white for this layout.  I really love the look of black and white and it looked perfect with the palette of aqua, gray and silver I chose to go with my October Afternoon paper.  I used my SMASH date stamp next to my photo, so we'll remember when we had this fun family photo shoot.  After stacking and adhering my papers, I used my sewing machine to machine stitch aqua, gray and white thread in a combination of zig zag and straight stitches.  I like the effect the stitching adds to my project, it coordinates with the vintage look of my camera stamps stamped on textured paper.  It also contrasts with the shiny silver paper and bold sans serif  Bebas font I used for my title.  Last summer, it seemed like everyone on the internet was hashtag (#) crazy, so I thought it would be fun to use one of the hashtags I use on Instagram as my title.  I used my Silhouette Cameo to cut the title.  #familylove is a hashtag I try to use on all my family photos, so I will be able to easily find them when I want to share them.


For embellishments, I chose a couple groupings of sequins and one tiny wood veneer camera from Studio Calico.  I painted this camera just like the cameras I used in my Wood Veneer Camera Shadow Box blog post.  I used pewter mist from Luminarte as paint, read about it in my shadow box post.

This was another fun chance to create with a brand new product.  I have some more projects created for Plus Corp.'s booth at CHA and I'll share them soon!  In case you missed last week's post, I shared my Disney Carsland Layout using another new roller stamp from Plus Corp and 2014 winter release stamps from Technique Tuesday.

Sharing this project over at 
So much fun over there, be sure to stop by & check out all the great St. Patrick's Day & Easter theme projects!


Friday, April 23, 2010

Layout of the Week - Punky Posh Mini Album with Punky Sprouts & Chatterbox Part 2

I thought I'd share a few detail shots of the album I featured last week.  I'm still in love with this album.  I have some more ideas for creating a totally different look with this same album.  I did make another of Punky Sprouts's albums last week.  And after I return from my relaxing vacation to Mexico, I'll share it with you.  I'm in Mexico as you're reading this, hopefully laying in the sun sipping a margarita celebrating 40th birthdays with a couple of my closest friends.  I don't have my 40th for a few months, but we're all going to celebrate all year...there's no law against that...is there?


I like to embellish these little mini albums with all sorts of things.  For this one, I added some tags, ribbon & twine.


I liked the burlap page I made so much, I added a little scrap to the cover.  It was fun piling things on the cover over the dry brush painting I had completed earlier.  I think the date tag is a great idea, it's always fun to remember the exact date of an occasion.  The felt birdie was a fun last minute addition when I thought the empty space was a little too much.


For Delaney's page, I created a girly look...sparkly glitter paper, velvet flocked paper with a scalloped edge, pom pom fringe, ribbon and a butterfly.


I created my own page to add to this album, trimming burlap and using a zutter hole punch to create the holes.  I thought the rough texture suited a rambunctious little boy!  I added the bit of ribbon on the right at the last minute, just pulling on the burlap's twine pieces to create a space to weave the ribbon.


This was my quickest page of this album, just a square of lime paint to frame my photo.


This page probably took the longest to create.  I wanted a brown canvas page, so I got some at my local sewing shop and cut two pieces the same size as the album's other pages.  I used my sewing machine and ivory thread to add the details.  I'm not very experienced with the sewing machine, so I tried out the scallop stitch on this project.  It's so nice that when we use machine stitching on papercrafts people don't expect or want perfectly straight lines.  This would drive my mother nuts, she's such a great seamstress and tried for years to teach me to sew.  But she was forever pulling out my mistakes and I finally gave up.  I'm excited I finally found a use for that sewing machine that was stuck away in a closet!  And thank goodness, I still have my mom to do the "real" sewing! :)

Oh, and I love the felt embellishments that Chatterbox made to match these collections, so cute and self adhesive too!


On the back of my canvas page, I stuck with little circle embellishments and a tag to create a boyish look.


This was another quick page.  Delaney is our artist, she loves all things creative.  So I just grabbed a foam brush, dipped it into the paints I was using on this project and randomly added touches of color to this ivory canvas page.  For a final touch, I added a little tag & some fun embellishments from my packs.


After the last busy page, I wanted to calm things down a bit.  I used the self adhesive felt embellishments on this one.


I love acrylic, especially when it's mixed with other types of pages.  For the acrylic, I painted the Tropical Water paint around the edges with a small, dry regular paint brush.  When you try this type of technique, don't be too perfect, the messy look is in! :)  I used a Crop A Dile tool to punch two holes in the right edge and then tied a couple ribbon knots as accents.


I like how the acrylic page looks when it's turned & placed over the photo on the left too!


This page is on the right behind the acrylic.  I used a patterned paper to cover this page and then placed a smaller torn, inked piece of foiled paper on the left.  Next I inked around the whole page and added a little garden twine on the left, as a fun contrast to the foil paper.


For a fun Jake page, I chose a checked paper and some star & button embellishments.


For my last Delaney page, I used acrylic stamps and my lime & tropical water paints to stamp some flowers onto the canvas.  It was fun adding a little tag & butterfly as a finishing touch.


Again I used the stamps and my two paint colors for this page.  For my little journaling, I used a letter stamp that creates an old fashioned typewriter still look.  I stamped, "At Home Together, Our Favorite Place," in brown ink.


This acrylic page was my biggest stretch yet....  I used a large Technique Tuesday stamp in Versamark ink and then added lime embossing powder and heated it with my heat gun.  Just let me tell you, this technique is not for the faint of heart or perfectionists out there.  The acrylic folded up all funny while I was heating the powder.  I was doing this page while I worked a crop at the store and boy everyone was nervous about how it might turn out.  I'm pretty sure they all thought I'd ruined the page.  But I grabbed two pieces of white paper and used them to help me flatten the acrylic back to its shape.   I think it turned out great!  It definitely isn't perfect though.  There are a few little spots of embossing powder that didn't get blown off the ink and created little green spots.  And the acrylic isn't as flat as I would like it to be.  But I love the look and don't really mind the bumpy-ness of the page.  What project is really PERFECT in the end anyway.  How would you know it's homemade if it's perfect!!!?


Here's the stamped, embossed acrylic page laying over the page to its left.


For my final page, I used the teal blue flocked paper, a bit of ribbon and a little monogram tag.

As you probably noticed, I used sepia tone photos again on this project.  If you've never tried them, you definitely should.  It's impossible for me to imagine how busy this album would be with color photos.  And of course the perfectionist in me loves when color schemes are in harmony in my projects.

You should also know that it's OK to just shoot some photos around  your house or yard and use them in a family album.  This wasn't a photo shoot, we were just hanging out outside in the yard on one of the few warm spring days here in Oregon.  I did get my mom to shoot the family photo, but the rest are just candids my husband & I shot with my point & shoot.  So don't worry about everyone matching and setting an appointment, just get together & take some photos.  Depending on your chosen papers, sepia tone or black & white can cover a million color matching mistakes!


I decided to skip photos on the back cover.  Just a little paint & a dry brush...the ribbon is tied around the whole page.

Supplies

Brown Cardstock - American Crafts
Patterned Papers - artsy.licious, Fabulous and Together by Chatterbox
Embellishments - Tags, Buttons, Journal Boxes, Ribbon
Kaisercraft - Acrylic Paint: Lime & Tropical Water
Ink - Brown Pigment Brush Pad by Color Box and Versamark Pad
Stamps - Technique Tuesday and Provo Craft
Embossing Powder - Zing by American Crafts
Ribbon - Various Manufacturers
Garden Twine - Unknown Manufacturer
Sewing Supplies - Burlap, Brown Canvas and Ivory Thread from Local Sewing Shop


A little note from Julie...I hope you're all having wonderful weeks!  I am in Mexico this week to help my friends celebrate their 40th birthdays (well, I'm celebrating mine too, albeit a bit early!).  I can't wait to see what I can find on my vacation to inspire my next project!  Have a wonderful weekend! :)

Friday, April 2, 2010

Layout of the Week - FRIEND chipboard mini album


I'm excited to share this week's Layout of the Week with you!  But first, I want to apologize for missing all sorts of blogging opportunities last week.  It was Spring Break here and we took Jake in to have hernia surgery on Tuesday.  We were expecting to be home that day, but our wise surgeon advised us to stay overnight in the hospital just in case the little guy needed some extra pain meds.  And thank goodness we did, those extra pain meds let him sleep through just a few of the MANY interruptions...I know that the wonderful nurses & residents have to check in on patients all night long, but boy, it sure would be nice if patients could get more sleep in the hospital.  So my schedule was thrown for a loop last week.  But I'm bouncing back this week, just like Jake...baby steps for both of us!  If you're in the Portland area & in need of an excellent Pediatric Surgeon, I highly recommend Dr. David Bliss.  He's done surgery twice now on Jake and he's a great listener, explains everything so even people who aren't medical geniuses (like he is!) can understand and he's saved the lives of countless preemies, infants, toddlers & kids!

So back to my project!  I created this mini album to celebrate Delaney's 8th birthday.  I did actually get it done a couple months ago, so she did get to see it before her 9th birthday!  I used Bo Bunny's My Word Chipboard FRIEND album and Basic Grey's Lime Rickey collection pack, plus a ton of fun embellishments to create a fun, bright colored album, perfect for Delaney's Tie Dye Slumber Party Photos. (Read all about our Tie Dye Slumber Party activities HERE.)

I used one of my favorite tips to squeeze a ton of photos into this small book.  I created photo collages with Costco's photo organizer program so I could cut them apart and put all different sizes of the tiny photos on my pages.  I love being able to create these collages and use so many photos in such a small format album.

Here are all the fun inside pages!


Of course, since it's Friday, you can join me over at Ann's for her Virtual Girls' Night Out!  I'll be celebrating mine by working the crop tonight at Whimzee's Scrapbook Studio in Beaverton...if you're in the area, call to sign up (we have a couple spots left) or stop by & shop, I'd love to meet you!  Be sure to check out our online community if you're in need of some extra inspiration, we have 300 project photos for you to enjoy!

Tips

Use Costco's photo collages to squeeze a few more photos into your projects!

Don't be afraid to mix it up with bright colors & patterns, it creates a whimsical page!

Use paint to coat the edges of your chipboard albums, it covers up any number of flaws in your (or my) paper cutting skills!

Supplies

Basic Grey Lime Rickey collection pack paper & stickers

Bo Bunny My Word Chipboard Album - FRIEND

So many embellishments...it would take a year to list them all, if you have a few you're wondering about, leave me a comment & I'll get you the manufacturer info.

Sunday, March 21, 2010

Happy 9th Birthday Sweet Delaney!


Happy Birthday Delaney!

My sweet, loving daughter turns 9 today!

I want to wish a very Happy Birthday to this wonderful, creative, athletic, intelligent, compassionate, thoughtful girl.  She makes a great daughter, big sister, friend, granddaughter...and so much more!

Your dad & I are so proud of everything you do!
And Jake, well, he says, "PLAY DEE DEE!!  PLAY DEE DEE!!"
:)

Have an awesome day and never forget how special you are!

PS-Kudos to Brooke at the Washington Square Sears Portrait Studio!  She took these wonderful photos of Delaney and so many more...of Jake also, even though it seemed we were pulling out all his teeth without anesthesia.  She somehow manage to make the phots look like they were both having a great time, not just Delaney!  So if you're in need of a photographer, give Brooke a call!

I'll share more photos & tell you more about Jake's fun Saturday in another post.
Wish us luck on Tuesday, Jake's having his second surgery for an inguinal hernia...first was at 5 weeks.

Friday, March 12, 2010

Layout of the Week - Believe Achieve (my words for 2010)

I just have to say, I love this layout.  It isn't very often as scrapbookers that we create layouts about themselves.  At the beginning of this year, I read a lot of different blog posts about finding a word for yourself for the year.  The word would be your theme word, giving you something to focus on throughout the year.  I started to think about myself and all the things I've done in my life and the things I'd like to do in the future.  Being the mom of a two year old, it has been a while since I've thought about my own goals or even thought much about myself at all.  I was just starting to get back to thinking about me when Delaney turned 6 and was at the end of her year of 1/2 day kindergarten.  It was nice to look ahead at the things I could start to do for me once she started school full time in September of 2007.  And then suddenly my world was turned upside down.  I found out I was pregnant with Jake in June of 2007, just a week before Delaney was done with kindergarten.  It was quite a shock after about 5 years trying to conceive and then coming to terms with our being a 3 person family.  I still can picture the look on Dave's face when Delaney & I told him we'd be having a baby.  I'll tell you more of this story another time, but suffice it to say, shock doesn't even come close.  So my thoughts took an about face, away from what I wanted to do with the "rest of my life" and toward raising another little one.

As I was reading these "word of the year" blog posts in January, I thought maybe I should think about me a little sooner this time and not wait until Jake was going to be in first grade...for goodness sake, I'll be 43 by then.  Here's my first Believe Achieve blog post.  And the thought of turning 40 this year also added to my eagerness to make plans that were mine alone.  For years, I've been involved in scrapbooking in some way, working on albums at home, helping my friend with projects, working at Whimzee's, writing my blog.  I also began another of my efforts at being healthier and losing weight this year.

Being someone who isn't short on words, I couldn't narrow my choices down to just one.  For my 2010 words of the year, I chose Believe and Achieve.  I chose them even before I walked into Jake's room to get him up from his nap and saw those exact words stenciled on a plaque on the wall in his room.  Dave chose it at a baby boutique when we were shopping for bedding & decorations for his room.  It hangs over his crib and someday we'll explain to him what they mean...right now, he just enjoys pointing out that there is an "A" on the sign.

These words are important for me to remember this year, because I have a few goals for myself.  I want to expand my blog and find a sponsor or two (if anyone has any suggestions, bring 'em on!) and I hope to be chosen for a Design Team of some sort in 2010.  I also want to continue with my efforts to work out, eat healthier and by doing those things, lose some weight.  One more important goal, for the whole family really, is to make smart money choices.

I think that I am moving toward all these goals, but I do have to remind myself everyday, that I have to Believe in myself and make efforts in order to Achieve them this year.  I created this layout to highlight my words and remind myself everyday of what I am working toward.  I challenge you to find a theme word or two, even three or four, who's counting.

In creating a layout that highlights my words, I wanted to use some of my favorite products.  The papers are from Lily Bee and the embellishments are from all sorts of places.  I wanted to show contrast in this layout.  Not only am I a mom and wife, I also have personal and professional goals outside of my family.  These goals will benefit my family in many ways, but they are my goals.  I chose to create contrast in my layout by placing the rhinestone "BELIEVE" on a distressed piece of corrogated cardboard.  The rhinestone title also contrasts nicely with the slick orange "ACHIEVE."  I created depth by using a cardboard circle covered with word filled paper.  I used pop dots to raise my photo above the background.  Again highlighting my words, I used Photoshop to print them on my photo.

I love this photo of me.  I asked my friend, Pandra, to shoot a photo of me to send in with a design team application.  I was planning on changing & doing my hair first, but she just got out her camera one night when we were hanging out with friends.  They started telling jokes & I couldn't keep a straight face.  It just all went downhill from the very beginning....  This first photo was the best of the bunch!  Thanks P! :)

Tips

Think of a theme word for the year & remind yourself of it everyday!

Create a layout or project highlighting your word and place it somewhere you will see it everyday!

Don't be afraid to create contrast with by using totally different embellishments in your layouts.  Rhinestone & cardboard...glitter & slick plastic.

Have a friend shoot some photos of you and create a layout that shows your personality or how you felt that day!

Supplies

Patterned Paper - Lily Bee
Rhinestone Title - Kaisercraft
ACHIEVE & 2010 - THICKERS by American Crafts
Paint - a variety of craft paints

This post shared on Today's Creative!  Be sure to check them out for links to all things creative and the best features of creative blogs on the internet!


Sunday, October 25, 2009

Finding Inspiration with Photography

After a morning of trying to get some creative work done, but not being able to become inspired, I headed out to my backyard with my camera. I left my steaming cup of coffee on the end table next to my laptop. I had just been reading my bloggy friend Yaya's great blog post about her favorite color, orange. I noticed that the sun was peaking out from behind a cloud shining dappled sun down on my newly orange Japanese maple. I decided to take a photo of it to email to Yaya, her favorite color & all.

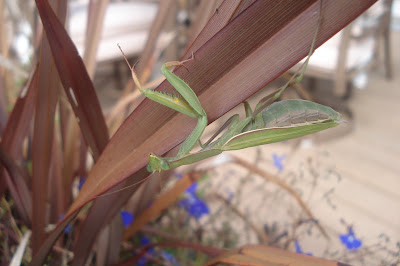
After I shot numerous photos of Leafy (Delaney named the tree when we planted it), I glanced around the yard. Although it's a pretty gray day, here in Oregon, the sun would peak out for a few moments here & there. I wandered the yard, purposefully looking at everything I could find. I shot photos of my maples turning on their Fall best. I shot photos of some strange mushrooms growing in the yard. Yes, Dave, I know this is strange, but their color & shape was interesting. I shot the ducks sleeping on the island in the middle of the pond behind our yard. I shot a huge yellow zucchini flower growing through the fence from the neighbor's yard. I shot the swings, lonely & empty, barely moving in the light breeze. I noticed how quiet it was for almost noon. All the neighborhood kids back to school & Jake napping upstairs. I shot my last bright red & orange cherry tomatoes of the year. Then I started to realize that I had just taken a rainbow of photos from around my yard. I was just missing the color blue. I stopped to take one last photo of the blue lobelia, still hanging on in my summer containers. As I shot the photo, I noticed one more harbinger of Fall. There was a Preying Mantis, hanging upside down,from the lobelia, watching me. After shooting her photo (Delaney & I always call them girls), I headed back inside to my now cold cup of coffee.

Who cares about warm coffee, when you can spend half an hour outside with your camera finding the inspiration to create all sorts of wonderful projects. So next time you find yourself needing inspiration, grab your camera & head outside. Shoot photos of whatever interesting things you find. You may find beautiful Fall leaves, white drifts of snow, gray puddles of newly fallen rain or just the shape your boot makes in the mud. But if you look at them with a creative eye, you will find the beauty in the simple creations of nature.

Try it sometime & let me know what you find!

(I wrote this last Monday and have just had the time to attach all these photos to it! Hope you enjoy them!)


By the way, I shot all these with my little Sony Cybershot digital camera, I don't own a DSLR, but it's on my wishlist! Almost all the photos were shot in the "soft snap" setting, where you shoot the subject with a soft background & no flash. Your camera might have a portrait setting, try it for your photos. I love the camera knowing to focus on my subject & then blurring out the background.

LinkWithin

Related Posts Plugin for WordPress, Blogger...