Showing posts with label tips. Show all posts

Monday, June 6, 2011

Party Favors the Kids Can Make...


If you're like me, you're getting tired of spending all the time and money to throw your kids wonderful birthday parties only to be left wondering what kind of fabulous gift you should spend even more money on to send home with each little party go'er...

Well, personally, I'm trying to move away from the party favor/gift bag craziness.  Last year for Delaney's party, we had a great American Girl Craft Party where the girls made their own favors as part of the party.  And the year before that, we had a Tie Dye theme for Delaney's party where the girls tie dyed a shirt and wore it home as their favor.  (Click HERE to see the mini album I made featuring all the fun of the Tie Dye party.)

This year, Delaney wanted to take three friends to dinner at Benihana and then back home for a sleepover.  Since dinner was going to be pretty expensive, I wanted to do some cheap little favors for the girls.  While I was thinking about my plan for the party, we got in some fun little tubes at the scrapbook store where I work.


The tubes are about $1 each at the store and are about 1 1/2" in diameter and 8" tall.


We gathered our supplies. (Of course I used my new favorite Willow House piece, the Riverstone Tapas Set...so useful, but I digress!)  Delaney wanted some fun bright colors for the tubes, so she chose Jelly Belly Jelly Beans in the colors she wanted (frankly the most expensive part of this project, you could choose any little candies that fit in the tubes).  Then we used some extra ribbons we had at home and a few little spools of $1 American Craft ribbon from the store.  I punched the tags with my large tag punch and printed out some cute cupcakes from a the Crystal's {Playground} elements pack, a digi scrapping pack I got over at JessicaSprague.com (I made the invitations from this same kit, I'll share them soon.)


Once Delaney had all her supplies, I left her alone to make up the favors while I finished cleaning the house.  I did have her let me know when she finished a step, so I could hurry in & shoot a photo or two.  Delaney's 10, but I definitely think that 7 or 8 year olds could do this project by themselves or as a fun activity during the party.

In preparation, we cut the ribbons in about 4" pieces and wrote the girls' names on the tags.

Then the fun began....

First Delaney filled the tubes with jelly beans.


Then she added the cap.


Next, she tied a few ribbons around the tube, adding a tag to the top ribbon before tying it.


Such a fun, simple & inexpensive party favor!  Give it a try for your next party...birthday, graduation, 4th of July, Halloween...the variations are only limited by your imagination!


My Birthday Girl had a great time with her friends & everyone left with a sweet little memory of the party!

Remember to join me over at Today's Creative for the "Get Your Craft On" link party every Tuesday!  If I'm not posting, I'm over there hanging out seeing what the creative ladies are sharing every week!


Todays Creative Blog

Thursday, March 17, 2011

Create a Crisp Look for Your Mantel this Spring...

With today being St. Patrick's Day & all, I thought I'd share a few photos of my latest "mantelscape."  I didn't change my mantel very much to achieve this crisp, clean look.  Take a look at my last mantel post & you'll find I didn't move or replace many of my pieces.  I was inspired by another Willow House Consultant's photos using split peas as fillers for this project.  I'm sorry I can't remember exactly whose page I found that idea on.

To me, green isn't just for St. Patrick's Day, although this does make a cute holiday arrangement.  I think of green as Spring, bringing with it all the new daffodil and tulip buds, as well as those tiny green leaves that will soon replace the flower buds on the trees outside my house.

I was very excited to find split peas at Winco in the bulk bins for only 51 cents a pound.  I bought 5 pounds, and after filling these containers, I still have quite a bit left.  So if you'd like to just buy a couple pounds, that should work well for this project.

As I mentioned, I didn't change my mantel much to create this look.  I removed a couple pieces and replaced them with a large hurricane and some fun green items collected from around my house.  Most of the mantel items come from the new Spring/Summer 2011 Willow House catalog.  (I'll put a link to my website at the end of this post for those of you who would like some more Spring inspiration or who would like to order an item or two from my mantel.)

Being someone who loves symmetry, I always try to give some balance to my designs whether they are created on the computer, with paper or home decorating items.  For this mantelscape, I left my two Stiletto Pedestals in the center, filling in around the candles with the bulk split peas. 

My large hurricane is one of my favorite decorating pieces.  Here, I filled it about 1/3 of the way up with the split peas & pushed an ivory candle down inside until it was firmly set into the split peas.  I've used this hurricane for all sorts of fun holiday arrangements that I share during my parties, and I promise to share those ideas with you soon too!  On either side of my mantelscape I placed small Dragonfly Lanterns filled with just a few of the split peas and a small battery operated tea light.

I placed the small lanterns on either end of my mantelscape to help lead your eye up to the next, taller items.  Sometimes I like to create a pyramid shape with my mantel, having the smallest items on the outside edges and then progressively taller items on each side until you reach the tallest item in the center.

With this mantelscape, I chose to place the smallest items on the outside edges and then a tall item next to each of those.  Next I placed a shorter item on each side and then a taller one in the center.  Sometimes I think it's fun to create a look that encourages your eyes to follow the lines up & down as they view a design.

Some of the fun green items I collected around my house help create a whimsical, personal look for my mantel.  The little plastic grass in the wood container was originally purchased to place out at Easter, but over the years, I've used it in many ways, my favorite being combined with some sand & sea shells for a summer centerpiece.  On the dark pedestal, I placed a dark green ceramic vase with a small frog and next to that I placed Delaney's gymnastics photo from last year.  Dressed in green with a green background, Delaney's photo adds some fun to my mantel and helps it become a much more personal look.  This mantel is mine and couldn't be found in anyone else's home.

While you're looking through magazines, blog posts & internet articles for decorating ideas, never forget to add a little something to personalize the look.  Of course you want people to oh & ah about the decorating looks you create, but you also want them to see you & your family in your home too.  We live in our homes, they aren't just created for magazine photo shoots, so don't be afraid to use your family photos and keepsakes in your decorating!

If you're looking for items included in my mantelscape, head over to my Willow House website to find the Stiletto Pedestals, large Galveston Hurricane, small Dragonfly Lanterns and Rosedale Plant Holders. (The tall pedestal is a discontinued Southern Living at Home item.)  On my website, you'll find all sorts of decorating ideas and you'll be able to order from both the Willow House catalog and bargain priced outlet.

And if you just can't get enough decorating ideas, don't miss the new MyStyleShare website created by Willow House as an online decorating community.  It's free to join and upload your decorating photos and videos.  Tons of ideas are already on the website and I'm working on adding more to my page during the next few weeks.  My username is julies, and I'd love to hear your decorating comments and questions either here on my blog or over at MyStyleShare.

Enjoy your St. Patrick's Day!  I'm off to add a little green frosting to my cupcakes & make an Asparagus Pizza for dinner!  All green, all the time around here!

This week, I'm sharing my post with the bloggers over at Today's Creative!  Tuesday is "Get Your Craft On" day over there and there are usually about 500 bloggers who link their creations every Tuesday!!!  So this is THE Place to find all sorts of new ideas perfect for decorating & crafting of all kinds every week!

Monday, January 10, 2011

Organize the Clutter in Your Entryway

By the time you're reading this, I'll be in Phoenix getting ready to watch the BCS National Championship football game.  My husband & I are taking the kids and heading to Phoenix to watch our beloved Ducks play in their first National Championship.  It's sure to be a blast, I can't wait to share a few of our stories after we get back.

Since it's January and we're all trying to get organized and find places for all those Christmas gifts, I thought I'd share the way I keep my everyday items organized in my entryway.

The next you look at all those keys, sunglasses, electronic items and other things that clutter up our countertops and tables, remember these tips:

* Grab a basket, bowl or box and use it to stash those items that you need close by but don't want just hanging out on the counter.  You might want to choose a container with a lid to really hide your items.  If your container doesn't have a lid, don't worry, just gathering them together will help give your entry an organized look and you will have one place to find those things that seem to wander around the house and lose themselves just when you need them.

*  If you have a plug in close-by, use it for the cords to your electronic items.  Cut a hole in the back of your basket or box and stick the end through, now you can use your container as a charging station.


*  Of course, any container will help you become more organized, but a pretty one also lets you add a bit of your own style into an area where everyone coming & going from your home stops.

For my organization project, I used a couple of my favorite Willow House items.  The Farmhouse Tiered Basket gives me a place to organize my stray items in its bottom basket and a place to display some seasonal decorations in its top basket.  To keep things even a bit more organized and divided into sections, I used two of our small Gail Pittman Alfresco Collection Servers.  In the top basket, I used a grouping of 3 IKEA vases and 3 silk flowers.  At 79 cents each, the vases were my big bargain for this project.  To give my entryway a seasonal look, I change out the flowers every once in a while.  During the fall, I used some sunflowers from my garden to create a cheery, sun-filled look.


Next week, I'll give you some how to tips for the tag I added to my arrangement.  It was a fun craft project we created at the scrapbook store during one of our events last fall.

If you'd like to see the Farmhouse Tiered Basket or the Gail Pittman Collection items, stop by my Willow House page.

Friday, December 31, 2010

A Fresh Clean Look for Your Mantle to Carry You Through January

Now, don't get me wrong...I LOVE Christmas just as much as the next decorating-happy lady.  But there is also something to be said for taking down all those colorful decorations and replacing them with something streamlined, something fresh, something that creates a calm feeling after all the excitement of the holiday season has slipped away into your memories and hopefully a scrapbook page or two.


As we move deeper into winter and see the sun less & less (I live in Oregon, so it's pretty dark around here this time of year.), I decided to add a little light to my mantle.  In a family room with dark red walls and a lot of black accents, a shades of creamy ivory seemed like the way to go.


I like to carry a theme across my mantle while varying the heights of my display pieces.  Ivory candles and stoneware pieces combine to give a calm, peaceful look to my mantle and serve to create my theme.  For a touch of whimsy, I added a bust my daughter created in an art class to the mix.  And to bring a little nature inside, I added some evergreens from the yard and natural spheres.


To add some height on the right side, I added a luminary and some more greens from the yard atop a dark pedestal.  Using the ivory items in combination with dark iron accents and shiny glass pedestals.

When I create displays for my mantle, I try to follow a few simple tips:

Choose just one or two colors.

Use items of varying shapes, sizes & heights.

Add a little something from nature, even if it's a group of silk flowers.

When arranging my items, I try to space items of the same color across the mantle, leaving space between them.  I like to see a little of the wall color between my items.

Using dark color items or items made from dark metal in varying shapes adds a nice texture to the display.

Use some of my tips the next time you create a new display for your mantle, I think you'll be pleased with the results.

Find some of the items I used to decorate my mantle on my Willow House Website.  And look for more decorating tips on my Willow House Julie Facebook Page.

From left to right on my mantle are these current Willow House items:

Villa Footed Server

Drake Firefly Lantern
(Set of 2, I used one.)

Estate Trivet Trio
(Set of 3, I used one.)

Stiletto Pedestals
(Set of 2, I used both.)

Rosedale Planters
(Set of 2, I used both, one here & one on the far right.)

Villa Stoneware Salad Plate

Amira Luminary
(Set of 3, I used one.)

Tuesday, December 28, 2010

A New Year's Centerpiece & A Bloggy Resolution

Happy New Year!

I can't believe that 2011 will be here in just a couple days.  2010 was an eventful year around here, and I'm sure 2011 will have its share of surprises too!  I'll be back soon to share a year end wrap up and more about my plans for 2011.  But for now, I'd like to put my first 2011 resolution in print.  "I, Julie from JulieChats, will do my VERY BEST to post every week here on my blog, sharing something creative to inspire my readers to pull out their papercrafting supplies or do a little something to beautify & organize their homes."


This week, I'm getting a jump on my resolution by sharing a centerpiece I've created to celebrate the coming New Year.  To me, silver is the color of New Year's.  And since I use a lot of red & green in my Christmas decorating, it's fun to pull out some of my blue items to combine with the sparkle of the silver.

To create my centerpiece, I took a tour around my house thinking about things that would create fun silver & blue New Year's theme centerpiece.  Since starting my Willow House business in September, I've managed to collect some fun new items to use in my centerpieces.  I wholeheartedly believe in using items you already own with new ones to create a look for your home that's all YOU!  Mixing the old with the new also saves money, which is a big theme at my house.  So the new items I choose have to be versatile and useful in many ways, for many occasions, all over my home.  Getting them for free or at a discount is a HUGE plus too!

So on my little tour, I found one of my favorite Willow House items that I ordered in August, even before I became a consultant.  I chose to purchase the Cyprus Footed Bowl with Hostess Dollars from my 40th Birthday Willow House Party...so, it was FREE for me! :)  (Bowl was $59.96, now $49.96)  Then, I continued my tour and found two items from the new Spring/Summer 2011 Willow House catalog that I just knew would go perfectly with silver & blue.

I chose the gorgeous, Mediterranean Sage Bowl and the stately Stiletto Pedestal (I used the small pedestal, it comes in a set of 2 with a large & small version) (Set of 2 $49.96).

To fill my bowl and pedestal, I gathered silver & blue decorations from other centerpieces & arrangements around the house.  Fun silver garland with little stars, a silver string of beads discovered for less than $2 at the grocery store, one pick cut into 3 pieces featuring sparkly balls found at Michael's for about $1.50, 3 mirror-ball ornaments from Michael's (about $1 each), a collection of various small ball ornaments I've had for years, in shades of blue & white gathered from a Christmas arrangement and a silver, iridescent bead encrusted candle purchased years ago from Pottery Barn during a day after Christmas sale...I now had everything!


I started putting together my New Year's centerpiece.  First, I set the Mediterranean Sage Bowl inside the Cyprus Footed Bowl, to raise it up and give it a larger presence on my table.  Next, I placed the candle inside the Stiletto Pedestal and set the pedestal in the center of the Sage Bowl.  I ran into a little problem here, the center of the bowl is concave and the pedestal wouldn't stay in the center.  It kept sliding to one side or the other.  I thought about what to do.  If I had any of the little sticky stuff that you use to hang posters on the wall without damaging the wall, I would have tried to stick the pedestal to the bowl with that.  But since I didn't have any, I used a white fabric napkin, folded in quarters and placed in the center of the bowl.  When I set the pedestal on top of the napkin, it didn't slide around.  Now this isn't a really sturdy fix, but I'm not leaving the centerpiece where my 2 year old can play with it and I don't live in earthquake country, I think it will make it through New Year's Day just fine!  The napkin did stick out from under the pedestal's bottom, but I just made sure to arrange my garland and beads to cover it as I laid them around the bowl, circling the pedestal.

No, expert knowledge is needed to create this centerpiece.  Garland and beads are forgiving and since they sparkle, any arrangement of them looks great.  Just toss the garland in the bowl around the pedestal and lay a length of beads over the top, letting it fall into the spaces between & around the garland.  I did have a small piece of beading that I'd cut from the larger length in order to create a different arrangement, so I used inside the pedestal, laying it around the candle to give it a little more sparkle & another layer of silver.


Next, I placed the mirror-ball ornaments.  One of the design principles I've learned after years of doing my own decorating, watching tons of decorating shows and following even more decorating blogs, is that an odd number of items makes an arrangement that is pleasing to the eye.  And being a layout designer with some graphic training & a lot of scrapbooking experience, I know that using touches of the same colors or same shapes in a triangle pattern around your canvas, paper or container, helps the eye travel around your creation in a pleasing manner.  For me, it's easiest to use 3 similar or identical items and arrange them in a triangle.  So I did this with my mirror-ball ornaments, placing them gently into the garland and beads.  Next, I arranged the 3 picks in a triangle around the bowl, tucking the ends into the garland.  Last I took my small ornaments in various shades of blue & white and used them in little groupings around the larger mirror-ball ornaments.  I used the principle of odd numbered items here too.  While placing the small ornaments, I considered their color and tried to place each group of them in a triangular shape around the bowl.


TIP

Now, when I talk about placing the items in a triangle, I'm not saying that you should be exact and place everything very symmetrically into your centerpiece.  For this arrangement, I placed the smaller ornaments in a triangle around the bowl, nestling them in around the larger mirror-ball ornaments, but not in exactly the same spots, just in close approximation.  Check out my photo and look for the "same color" small ornaments to see what I mean.  The arrangement should have the colors and shapes, well placed to help the eye travel all around it, but it should also not be obvious that you were trying to create a triangle in your arrangement.  If it helps you to create a very symmetrical arrangement first, that's great.  Then try moving your elements around just a bit, so that they look like they just happen to have fallen into their places and weren't placed there with the precision of a magnifying glass & measuring tape.  It may take a little work to be happy with the placement of your elements, but I think that if you take a some time moving your elements and looking at them again & again, you'll find a look that's pleasing to you.

I hope you enjoy my centerpiece and learning a little about creating your own centerpieces.  Sign up to follow me or have my posts emailed to your inbox and you'll be among the first to learn more about decorating around your own home.

If you're interested in the items I used to create my centerpiece, please visit my Willow House Website.  And if you'd like to receive my monthly Willow House newsletter, featuring design ideas, recipes and the latest sale & special news, leave me a comment saying so here, with your email address.  I also have a Willow House Facebook page, where you can "LIKE" me and get fun decorating ideas & sale info. in your news feed.

Thank you for following JulieChats and I hope you enjoy my new creative direction.  I'm planning to share papercrafting ideas along with decorating tips & projects each week.  Stay tuned for all the news on my Scrapbook Studio reorganizing project.

The Mediterranean Sage Bowl is featured in the new Spring/Summer 2011 Willow House Catalog and will be available for sale January 1, 2011.  The bowl sells for $69.96 and is microwave, dishwasher and oven safe.  It is large, measuring 15" in diameter and 4 3/4" high.  In addition to creating a centerpiece in my new bowl, I used it to hold a big salad for Christmas dinner.

Leave comments here or email me at willowhousejulie@aol.com anytime.  You don't need to be invited to a party to order from my website 24 hours a day, 7 days a week.  And when you stop by my website and click "Shop Online," don't miss the Online Outlet featuring tons of mark down items and showcasing Weekly Specials that change every Monday.  Items will be delivered directly to your home and when you spend $40 or more (including regular and outlet priced items), you qualify to receive one regular priced catalog item up to $40 for 1/2 price.  So stock up on outlet items and get your favorite catalog item for 50% off!!!

Thursday, February 11, 2010

Layout of the Week - Bo Bunny's Love Bandit

I hope everyone is all prepared for Valentine's Day! I still have a few cards to make & projects to finish. I've been a very busy girl for the last week or so. I've finished quite a few projects. One for Delaney, this Valentine layout and one to submit for an Ella Publishing contest...if it wins, I'll share it with you when it's published and if not, it will make a fun Layout of the Week. I'll share the others with you soon.

I created this week's layout with my favorite Valentine collection of the season, Love Bandit by Bo Bunny. (Check out Bo Bunny's Blog for lot's more Valentine inspiration!)  I love the use of color on these papers. It's refreshing to get away from just red & pink papers for this holiday. Not that I don't love all the hearts & sparkle Valentine's brings, but too much of anything can be overkill. So this cute collection full of little racoons & bugs jumped out at me.


Once I chose the paper, I happened upon a sketch contest on Ella Publishing's blog. When I looked over the sketch, I thought it was the perfect layout for my papers & the photos of my kids. Since brown is one of my favorite colors, I love to use sepia tone photos. These photos are from Jake's 2nd Birthday a couple weeks ago. He's wearing his red Christmas "mun-in" (monkey) jammies and they certainly didn't complement the Love Bandit papers at all. So I printed them in sepia which looks great with the browns & other colors of these papers.

Lately it seems like I've been making a lot of single page layouts.  In the past, I was a total double page spread (DPS) girl.  My love of symmetry always led me to create two pages for each layout.  But I have started to find more value in one nice large photo for a single page layout, you know,  a picture is worth a 1,000 words & all.  But I love this Love Bandit paper collection so much, that I decided to add a right side page to my sketch for the Ella contest.  I chose the blue patterned paper, I like how it coordinates with the brown background of the left side without being exactly the same.  See what you think....


And here the two layouts are side by side, just like they'll look in my album...


I hope everyone enjoyed my Valentine layout!  And I hope you enjoy your long weekend...hopefully it is a long one for you like it is for us!

Happy Valentine's Day!

See you back here tomorrow for Ann's Virtual Girls' Night Out!  All you bloggers out there really should check out Ann's party!  We have a lot of fun every Friday night, meeting & greeting bloggers from all around the web and the world!  I wonder if Ann's theme will be Valentine's Day or the Olympics or a combo of the two.  Those of us on the West Coast are very excited that they Olympics are in our time zone this year, maybe we'll catch more of the action!

Tips

Use sepia tone photos to easily coordinate a layout with brown tones.

Use 7 Gypsies buckles to hold just one little knot of ribbon instead of on ribbon running all the way across your page.

Don't be afraid to use two different background papers on one DPS.  Do try for a solid or unobtrusive background if one side is a pattern.

Don't let your photos hide your pattern.  Get out that craft knife & use it to trim around part of your pattern.  Check out the right side layout.  I used the craft knife to cut around the portion of the tree that would have been hidden under my photo mat.  Then I stuck my photo mat under that portion of the tree, letting the tree pop out over my photo.

Don't let those extra dots that come in the packs of THICKERS go to waste, use them as mock brads!  I put them on my tags on the left side layout.


Supplies

Bo Bunny:  Love Bandit patterned papers, chocolate dot paper, stickers, ribbon
7 Gypsies:  Pink Buckle
American Crafts:  Green Glitter THICKERS-dots & bracket
Martha Stewart:  Punch Around the Page Punch


Wednesday, December 23, 2009

Layout of the Week - 'Tis the Season!


I'm so sorry I missed posting this layout as my Layout of the Week for last week!  Forgive me!  I was 'a bit' crazy trying to send out packages, cards & deal with Delaney's class party.  Oh, gee, I can hear so many of you who know me saying, "Shocking, Julie took on too many things at once!"  OK, I admit it, YES I DID!  But it's all over now & I'm on to taking on too many baking projects in one week!  But boy those cookies sure taste good!  Apparently my problem with not knowing how to say NO extends to cookies too!

Well, this layout is one of my favorite recent projects.  It's a photo taken last Christmas of Jake in his Christmas jammies just after he opened his Toy Story phone.  He was SO excited!  Who knew he would later eat off the number sign & I would have it handed to me by the nice lady who works in the nursery at our church.  She just laughed, having a little guy just a month older than Jake.  Then she told me what Delaney had said when she found the rubber key in his mouth, "You know, I told Mommy that the phone says it's for ages 3 and up!"  Out of the mouths of babes....  But still, his expression and those two teeth are priceless.

As far as the layout goes, the wood background is from LUXE (which sadly has closed up shop) and the other papers are new this year from Creative Imaginations.  I used three colors & two sizes of the Mark Richards mosaic tiles on this one, along with two different sets of THICKERS.  I'm always trying to create just one more title out of a set of these and darn if I don't use each set on 3 or 4 layouts!  Just mix & match if you don't have enough to write out your whole title.  And if you're, just a bit psycho, about color like I am, don't be afraid to paint them or just add a coat of glitter glue to them.  On the " 'tis," I used red paint & red glitter.  On the "season," I left them brown & added a coat of red glitter.  The "the" is created from Mrs. Grossman's stickers, an old set I have used many times.  The cute little letters at the bottom are some of my current faves from My Little Shoebox.

And do take a look again at Mr. Jake's darling smile, my next post will be yesterday's visit to Santa and he certainly isn't the one smiling!

Tips

Again, I'm mentioning Costco, but they really do make great large prints, like this 8 x 8 one.  Give them a try for your next printing job.

Don't be afraid to mix your font styles in your titles.  Just stay with one or two bold ones and try to stay with the same color or coat of glitter.

When mixing patterns, try a few large rectangle blocks on your page and round the corners for a unique look.

Supplies

Background paper - LUXE Designs - :( not around anymore
Patterned papers - Creative Imaginations
Tiles - Mark Richards
Titles - THICKERS - American Crafts
            Mrs. Grossman's
            My Little Shoebox

Thursday, November 5, 2009

Layout of the Week - Children of the Corn


In honor of Halloween, I created this fun layout last week. Our first outing of the Fall was a trip to The Pumpkin Patch on Sauvie's Island, just outside of Portland. If you're in the area, you should definitely add it to your Fall list next year. They've got a great maze, farmer's market, lot's of food booths...elephant ears, corn on the cob, carmel apples, sausage, burgers, loaded baked potatoes...animal barn, gift shop, hayride to the pumpkin patch (or skip it if it's too muddy & pick one from the huge pile next to the market) and of course a HUGE maze. This year's maze was a tribute to the Portland Trail Blazers, check out the photo in my layout.

This layout was my first effort at designing to someone else's sketch. I have all sorts of sketches & sketch books in my inspiration pile, but this is the first one I've done right to the sketch...pretty much, anyway. I created it for a layout call from Ella Publications. It was a lot of fun to try a technique that I've recommended to so many people, but haven't tried myself. I'm near the end of a set of 6 beginning scrapbooking classes where I've designed the layout, then created a sketch and kit for the participants. We'll be starting the classes again in January if you're in the Portland area and in need of some scrapbooking support! They're at the Hillsboro Library and they're FREE! I'll post about them when we've got the dates firmed up.

I was excited to use the Eerie collection from Basic Grey. I'm a big fan of using all sorts of patterns together in my layouts and Basic Grey's collections are some of my favorites. This layout features black vinyl THICKERS from American Crafts, I was excited to be able to create this title from a set I've used for two other layouts. That just shows you that the packs of THICKERS really give you a great selection of letters. My journal box is a tag from 7 Gypsies, I filled in the blanks and then wadded it up and stretched it out again, inking the edges & creases. I inked the outside edge of the layout with black ink to bring everything together. I put my little spin :) on the sketch, by tilting my layout, trimming the edges & mounting it on one last patterned paper...sneaking in another pattern...YEAH! My favorite embellishments on this page are my trusty garden twine (seem to be using it a lot recently) and the little black spiders were in a pack in my Halloween decorations, so they practically "jumped" onto the page as I created it!

I hope you're inspired to design your next layout from a sketch! Check out these cool sites for some great sketches:

52 Sketches ... a new sketch every week

got sketch? ... they've got 92 sketches on their site right now!

Creating Keepsakes Magazine ... all sorts of FREE sketches to download and also lot's of other cool downloads, brushes for you digital scrappers, journal boxes & tons more!

Tips

Give the sketch technique a try. Maybe keep to the original sketch your first time, if you're nervous. Then let your creativity go wild! Rotate the sketch 90 degrees, flip it over for a mirror image on the facing page, set your design askew on another piece of paper (what I did on this one), use journal boxes, embellishments or patterned paper in place of some of the photos...the ideas go on & on!

Use a tag instead of a journal box on one of your layouts.

Check out your gardening supplies, use twine instead of ribbon on your next project.

Supply List

Basic Grey Eerie collection papers

American Crafts THICKERS - Daiquiri black vinyl letters

Thick Twine (not sure of manufacturer)

Mini GlueDots

7 Gypsies Tag

Small plastic spiders (not sure of manufacturer) - found them in my Halloween decorations

Tuesday, October 27, 2009

Layout of the Week - I Love Your SMILE!


I was so excited to see the challenge handed out by the ladies at the Ella Publishing blog. They were looking for layout submissions with the title, "I Love Your Smile." That was the only criteria, just use that title. I think karma brought me to this gleeful photo of Delaney. For the past couple weeks, I've been designing baby layouts for my next beginning scrapbooking class, so I had a pack of photos of Jake when he was first born right there on the table. When I saw this page call, I flipped through the photos to see if any of them fit the title. And boy, this one jumped right out at me. This is THE happiest I have ever seen Delaney in a picture. It was taken, probably by Dave, just after Jake was born. We gave her this great I'm the Big Sister t-shirt and she was so excited, she put it right on. She was over flowing with joy that her little brother, whom she had waited so long for, was finally here! It brings tears to my eyes to look at it, when I think of how happy she was.

Her reaction to the photo, while I was creating this page, cracks me up! She looked at it and asked if it was taken when Jake was born. I said yes and that she was so happy. Being 8 1/2 now and having her brother be almost 2, she said, "I love him, but I don't know if I'm that happy about him now....he did cry a lot and...you know, mom, he's Jake." So that makes this picture that much more special to me, what a beautiful innocent smile, so excited that her baby brother is finally here. Unbeknownst to this sweet little girl are all the things about babies that aren't so fun, the SCREAMING (you have to know Jake to know I'm NOT kidding), the wet & poopy diapers, the hitting, throwing & destroying, etc. Of course she is still the happiest big sister in the world, when her little guy says her name, "Dee Dee, Dee Dee" or when he walks up to her, tilts his head, puckers his lips, closes his eyes, and cranes his neck toward her just hoping for a kiss.

Those are all reasons that this photo makes me a very happy mom! I hope you all create layouts showing something that makes you happy!

As far as the layout, I used the Cricut to cut the circles, placing my matted photo inside the largest circle to draw attention to it. I placed the title around the circle, also in an effort to draw attention to the photo. I chose journal strips for this page because a journal box might draw attention away from my photo. Inside the strips is my jounaling, "a girl was never so happy to have a little brother." I think that all the elements of this page help draw attention to Delaney's photo. I think it's important for her to have some pages in her album commemorating her brother's birth that show her reaction. He will have tons of blue pages showing all the exciting happenings after he was born and big sister needs a little attention too!

Tips

Try mixing chipboard styles when creating your titles. The mix will give your layouts a whimsical look.

If you aren't happy with the color of your chipboard, so ahead & paint it. Here I painted chipboard with both paint and glitter glue.

Don't be afraid to add other embellishments to your chipboard. Here I added ribbon, rhinestones & stickers to my chipboard shapes.

Supply List

Basic Grey June Bug collection papers
Admiral: used the back side
Park Bench: used the back side
Picket Fence: used the back side

Prizm light & medium pink textured cardstock

Pink Metallic Ribbon

KaiserCraft Basics: Rhinestones - light & dark pink and Rhinestone strips - pink

Creative Cafe pink chipboard shapes

Circle shapes all cut with the Cricut

"I" - Tim Holtz Grungeboard harlequin alphas

"your" - American Crafts THICKERS hat box plain chipboard

"SMILE" - Die Cuts with a View foil chipchatter uppercase - pink

Mrs. Grossman's casual alphabet stickers

American Crafts Memory Marker pen - soft black

Paint
Scrapbook Shades by Li'l Davis Designs - marshmallow

Ranger Adirondack Brights Acrylic Paint Dabber - raspberry

Sunday, October 25, 2009

Finding Inspiration with Photography

After a morning of trying to get some creative work done, but not being able to become inspired, I headed out to my backyard with my camera. I left my steaming cup of coffee on the end table next to my laptop. I had just been reading my bloggy friend Yaya's great blog post about her favorite color, orange. I noticed that the sun was peaking out from behind a cloud shining dappled sun down on my newly orange Japanese maple. I decided to take a photo of it to email to Yaya, her favorite color & all.

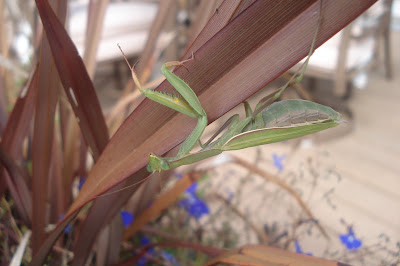
After I shot numerous photos of Leafy (Delaney named the tree when we planted it), I glanced around the yard. Although it's a pretty gray day, here in Oregon, the sun would peak out for a few moments here & there. I wandered the yard, purposefully looking at everything I could find. I shot photos of my maples turning on their Fall best. I shot photos of some strange mushrooms growing in the yard. Yes, Dave, I know this is strange, but their color & shape was interesting. I shot the ducks sleeping on the island in the middle of the pond behind our yard. I shot a huge yellow zucchini flower growing through the fence from the neighbor's yard. I shot the swings, lonely & empty, barely moving in the light breeze. I noticed how quiet it was for almost noon. All the neighborhood kids back to school & Jake napping upstairs. I shot my last bright red & orange cherry tomatoes of the year. Then I started to realize that I had just taken a rainbow of photos from around my yard. I was just missing the color blue. I stopped to take one last photo of the blue lobelia, still hanging on in my summer containers. As I shot the photo, I noticed one more harbinger of Fall. There was a Preying Mantis, hanging upside down,from the lobelia, watching me. After shooting her photo (Delaney & I always call them girls), I headed back inside to my now cold cup of coffee.

Who cares about warm coffee, when you can spend half an hour outside with your camera finding the inspiration to create all sorts of wonderful projects. So next time you find yourself needing inspiration, grab your camera & head outside. Shoot photos of whatever interesting things you find. You may find beautiful Fall leaves, white drifts of snow, gray puddles of newly fallen rain or just the shape your boot makes in the mud. But if you look at them with a creative eye, you will find the beauty in the simple creations of nature.

Try it sometime & let me know what you find!

(I wrote this last Monday and have just had the time to attach all these photos to it! Hope you enjoy them!)


By the way, I shot all these with my little Sony Cybershot digital camera, I don't own a DSLR, but it's on my wishlist! Almost all the photos were shot in the "soft snap" setting, where you shoot the subject with a soft background & no flash. Your camera might have a portrait setting, try it for your photos. I love the camera knowing to focus on my subject & then blurring out the background.

Thursday, October 22, 2009

Layout of the Week - Our Little Monster


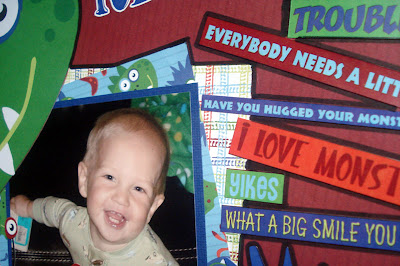
When I first saw the new Monster collection from Reminisce, I just knew I had to use it for a new Jake page. I had just taken some funny photos of him. Our own little monster turns into a tornado every day. The little tornado moves quickly across the living room to the hearth, where we store his toys, grabs things and starts dumping, tossing, throwing them across the room. He plays & plays in the middle of this mess. We reorganize & straighten up his stuff about five times everyday. All the little cars in their container, books stacked nicely, balls in the toy box, etc. And then he wakes up! And it's back to tornado mode! So one day, I decided to take photos of all the little messes he made that day, all over the room. Of course when I looked at the photos, the room didn't really look as messy as I thought it did. But still, picking up the same toys so many times everyday, I guess it just adds up!


I used my new favorite embellishment on these pages! I outline the edges of paper, stickers & photos with the thick end of my black Zig Writer. I love how the black helps make things on my pages stand out.


The pages have so much going on with all the color & pattern of the paper and stickers. And then there is also the size of the stickers to take into consideration. I wanted to add a little more embellishment, so I added a ribbon to the tag sticker on this page. It gives a little more dimension to the page, while not competing with all my other elements.


That day, as I was photographing his disaster, he just stood, leaning against the couch, smirking at me, as if to say, "Look how cute I am! There's no way you can be made at me about this!"

But wait...could he be turning over a new leaf? As I'm writing this, he just brought me the Swiffer Sweeper, out of the coat closet & had me turn it on so he could vacuum...we'll see...

Tips

After you finish a layout, add a thick black outline to some of your page elements to help them stand out from a busy background. I use the thick end of a black Zig Writer.

Try adding a thin solid color ribbon to your page, for a little extra dimension that won't take away from your page design.

Don't be afraid to cover up portions of your photos with large scale stickers.

Use a few smaller photos or wallets (as I've done here) grouped together. They give the feeling of one large photo, while telling more of the story than one photo would.

Supply List

Reminisce Monsters collection papers and 3 different sheets of Monsters self adhesive stickers: words, tags & journal boxes & large monsters

Thin Grosgrain ribbon, navy & orange

Zig Writer, black

Wednesday, October 14, 2009

Layout of the Week - Fall Leaves


These pages commemorate one of Delaney's favorite Fall activities, jumping in the leaf piles. Every year, Dave heads out to blow & rake the leaves in our backyard. He piles them up & puts them into the yard debris bin so they can be hauled away and turned into mulch. And it never fails, Delaney runs out into the yard, yelling for him to wait to put them in the bin until she gets a chance to run & jump into the piles. Of course being a mom who is always thinking of the laundry & stains that will be created by her kids' adventures, I remind her to run upstairs & put on some old clothes so I won't have to spend hours getting the wet leaf & dirt stains out. Then I grab my camera & head outside with her. I sit behind the leaf pile shooting tons of photos, so that I'll be sure to get some great action shots.

For the layout, I had a couple things to take into consideration. First, I was given sample sheets of the Shades of Autumn collection from Reminisce to create a sample for the store and I wanted to use as many of the patterns in my layout as I could manage. Next, I wanted to include as many photos as I could and still have the layout look balanced. Since this was one of my first forays into using many mixed patterns on a layout, I chose a neutral background for them. And then chose to use strips of the patterned papers so everyone could see how they worked together. Strips of paper are one of my favorite simple layout techniques. You can adhere them in a jumble manner, like I did here or place them in horizontal or vertical stripes or perpendicular to each other in the corner of your layout. I placed mine in a jumbled way to echo the way leaves fall into piles with colors and shapes all jumbled together.

With so much going on in my layout, I chose to mat my photos in a mix of neutral fall colors pulled from the patterned Reminisce papers. I used stickers from the Shades of Autumn collection on both pages. For a some extra texture, I added ribbons from American Crafts. And for one last embellishment, I placed four square bronze brads on the floral ribbon on the right page and one under the column of stickers on the left page.

For me, this is a fun layout, with a lot going on! And that's just how I feel about Fall, so many fun things going on to enjoy & photograph! So grab that rain jacket & scarf (some of you probably need ski jackets & snow boots too...) and don't forget your camera!

Tips

When shooting photos of the kids jumping in the leaves, try sitting down & stabilizing your camera by leaning your arm on something steady, like a tree, rock or even just your leg. If your camera has a setting for action, use it, if not, just use your auto setting. Next, focus the camera on the pile of leaves & send the kids running toward you, pressing the shutter when they reach the leaves. Try this a few times and you should end up with some fun photos.

If you're new at mixing patterns on your layouts, choose a few patterns from one collection and find a neutral that is common among the patterns and use it as your background.

Using strips of the patterns on your layout allows you to showcase a few patterns without having them overwhelm the photos on your page.

For an added embellishment, place brads on your ribbons.

Supply List

Shades of Autumn paper collection from Reminisce
dark brown cardstock from Prizm
ribbons from American Crafts
bronze square brads from unknown source

LinkWithin

Related Posts Plugin for WordPress, Blogger...